Manage Users#
Users enter AMD Enterprise AI Suite with their email address after being granted access. User management takes place in the Users section found in the navigation.
Main view#
The main user management view lists users with all relevant information. The user’s name and email address identify who the user is, and the role indicates their capabilities on the platform. The projects column shows the project the user belongs to. If there is more than one project, hovering over the project name will show all of them. Above the list is a search field that can search by name and address. Below the user list is pagination for navigating the user list.

User view#
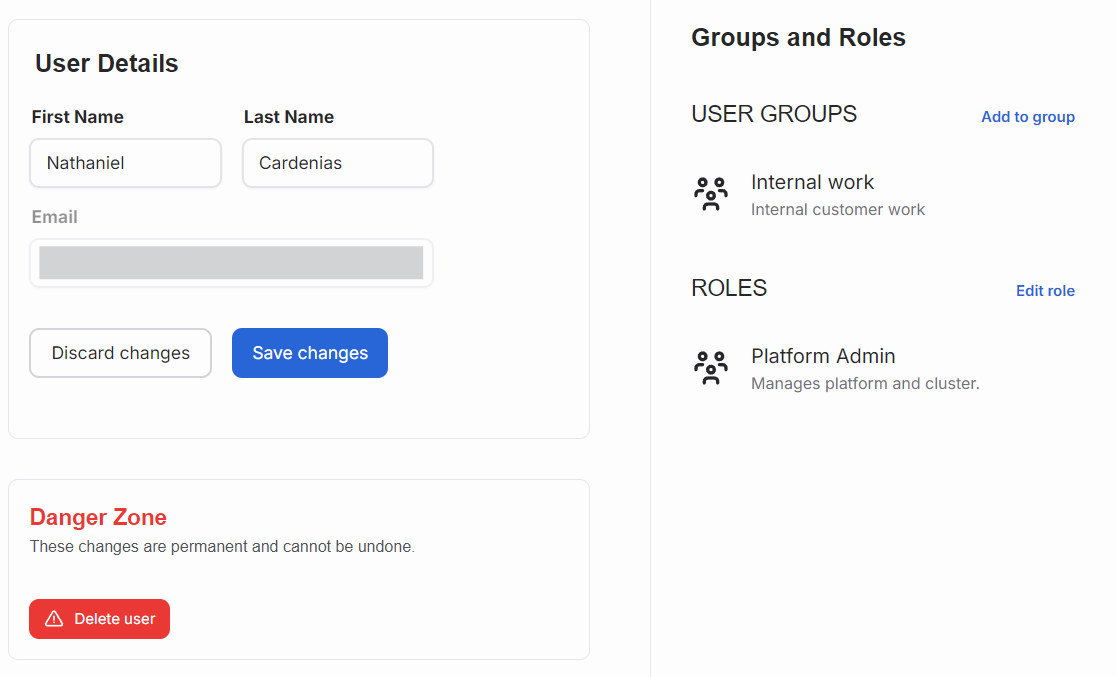
Clicking a user’s name in the list switches to the user view. It displays a form for updating the user’s name. The user’s email address cannot be changed in the platform. Click the “Save changes” button to apply the update.
The right pane lists the user’s assignments to different projects and their dedicated user role. Users with the appropriate role can adjust individual users’ projects or change their role.
Adding Users to the Platform#
There are two primary methods for adding users to the AMD Enterprise AI Suite, depending on your organization’s setup:
Single Sign-On (SSO) via Identity Provider: If your organization uses an identity provider (IDP) for authentication, user management is handled through the IDP. See SSO setup instructions for more details.
User Invitations via AMD Resource Manager UI: Platform administrators can invite users directly through the AMD Resource Manager interface using one of two approaches:
With SMTP configured: Users receive an email invitation to activate their accounts and set their own password. See the SMTP configuration guide for setup instructions.
Without SMTP (using temporary password): Platform administrators can set a temporary password during invitation. Users can log in immediately with the temporary password and will be required to change it on first login.
Note
If you don’t see the “Invite User” button in the Users page, this means an identity provider is configured and user management is handled by the IDP. In this case, users are automatically onboarded when they log in through the identity provider.
Invite Users via the Resource Manager UI#
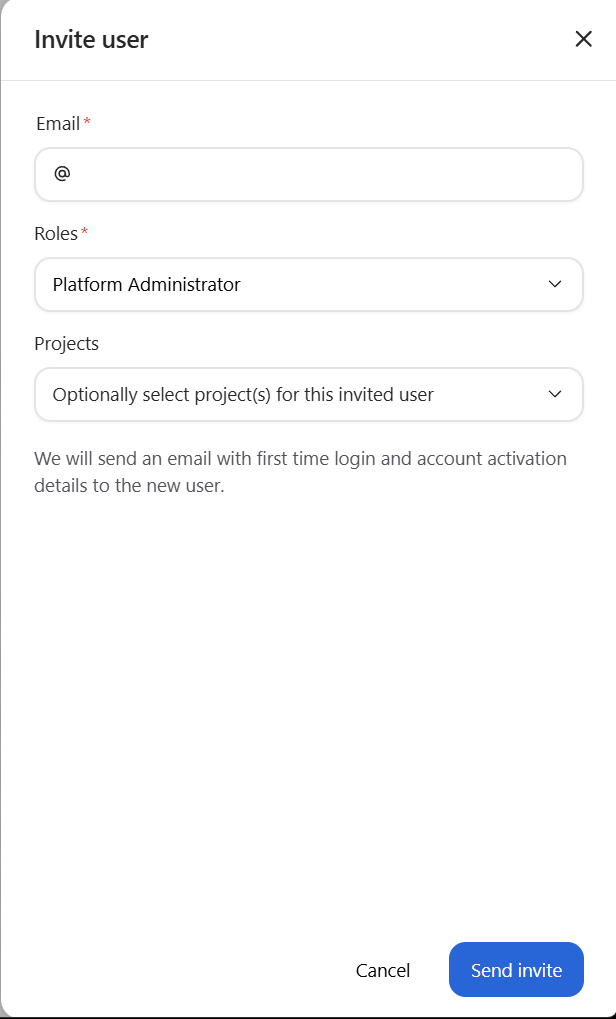
Platform administrators can invite new users via the “Invite User” button in the Users page. The invitation process differs depending on whether SMTP is configured:
With SMTP Configured#
When SMTP is configured in Keycloak, invited users will receive an email invitation. The invitation flow asks for:
User’s email address
Role (Platform Administrator or Team Member)
Optional project assignments
Users will receive an email to verify their account and set their own password. The main view in the Invited Users section lists all invited users before they have accepted and activated their accounts.
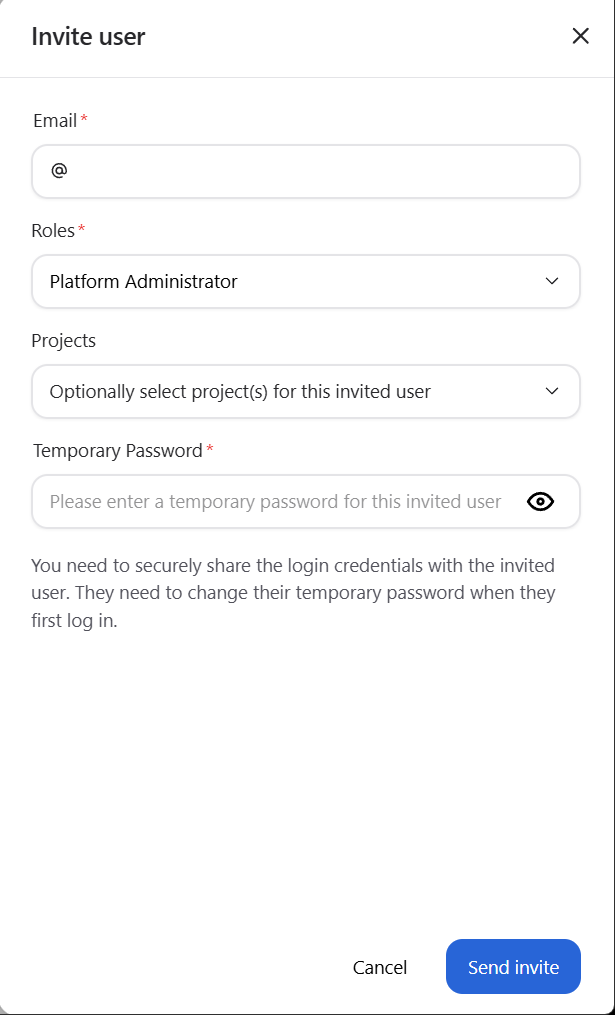
Without SMTP (Temporary Password)#
When SMTP is not configured, the invitation workflow requires you to provide a temporary password for the user. The invitation flow asks for:
User’s email address
Role (Platform Administrator or Team Member)
Optional project assignments
Temporary password (required)
Users can log in immediately with the provided temporary password and will be required to change it upon first login.
Important
Since no automated email is sent, the platform administrator must manually provide the user with their login credentials (email address and temporary password) through a secure communication channel.
Note
If the administrator forgets the temporary password that was set, it will need to be reset in Keycloak. See the Keycloak configuration guide for instructions on resetting passwords.
Only users within allowed domains are accepted on the platform. Platform administrators can update the organization’s allowed domains in Keycloak. See the Keycloak configuration guide for instructions.
When User Invitation is Disabled#
User invitation functionality is disabled in the AMD Resource Manager UI when an Identity Provider (IDP) is configured. If the organization has an identity provider linked and active, user management is handled by the identity provider, and users are automatically onboarded when they log in through SSO. Users can set up their system to use an identity provider with these instructions.
Delete Users#
At the bottom of the user edit page is an area called the Danger zone. It contains a button for deleting the user account. Deleting an account is a permanent action and should not be done without proper consideration.
Only platform administrators can remove users.