Onboard a Custom Model#
The Custom Models page lets you bring your own model into a project from one of two sources. Open it from the sidebar under Models → Custom Models — see the Model Catalog overview for how this area fits alongside AIM Catalog and Deployed Models.
Hugging Face — point the Workbench at a Hugging Face repository; the platform registers the model and fetches weights from the Hub when the model is deployed.
S3 bucket — point the Workbench at a folder in object storage where your model weights already live; the platform registers the model and reads weights from that location when the model is deployed.
Instead of choosing from the curated AIM Catalog, you preview the source, confirm what the Workbench found, choose a supported container image, and start onboarding. Once onboarding completes, your model appears alongside the other custom models in the project and can be deployed like any other model.
This page walks through the shared workflow:
Preview — inspect a source before committing to it.
Onboard — confirm the metadata, select a container image, and register the model in your project.
Note
This page covers previewing and onboarding a model. The runtime settings you choose here become the model’s Default profile; adding further profiles, tuning them in depth, and choosing between them at deploy time are covered in Custom Model Profiles.
Before You Begin#
You need access to a project in the AMD AI Workbench. The model is onboarded into the project you currently have selected.
Hugging Face sources#
Have the Hugging Face repository ready, either as a repository ID (for example,
example-org/example-model) or as a full Hugging Face URL (for example,https://huggingface.co/example-org/example-model). You can include a revision in the URL (for example,https://huggingface.co/example-org/example-model/tree/<branch-or-tag>); otherwise the repository’s default branch is used.For private or gated repositories, you need a Hugging Face access token stored as a project secret. See Secrets for how to create one. You can also add a token directly from the wizard while previewing. Popular gated repositories include
meta-llama/Llama-3.2-1B-Instructandgoogle/gemma-3-1b-it.
S3 sources#
Have your model weights uploaded to a folder in S3-compatible object storage. The Workbench reads weights from this location; it does not accept direct file uploads through the UI.
Know the S3 URI for that folder — for example,
s3://my-bucket/path/to/model. The URI must include both a bucket and a prefix (a path after the bucket name).Create an S3 credentials secret in the project with the Access Key ID and Secret Access Key that can read that bucket. See Secrets.
Create or prepare an S3 configuration that binds those credentials to connection details (endpoint URL and region). You can create one from the onboarding wizard or ahead of time. Each S3 configuration references an existing S3 secret and tells the Workbench how to reach the storage endpoint.
Your model folder should contain the files the inference engine expects — at minimum config.json, tokenizer files (tokenizer.json or tokenizer_config.json), and one or more *.safetensors weight files. If the weights are sharded across multiple *.safetensors files, include a *.safetensors.index.json index file as well.
Open the Onboarding Wizard#
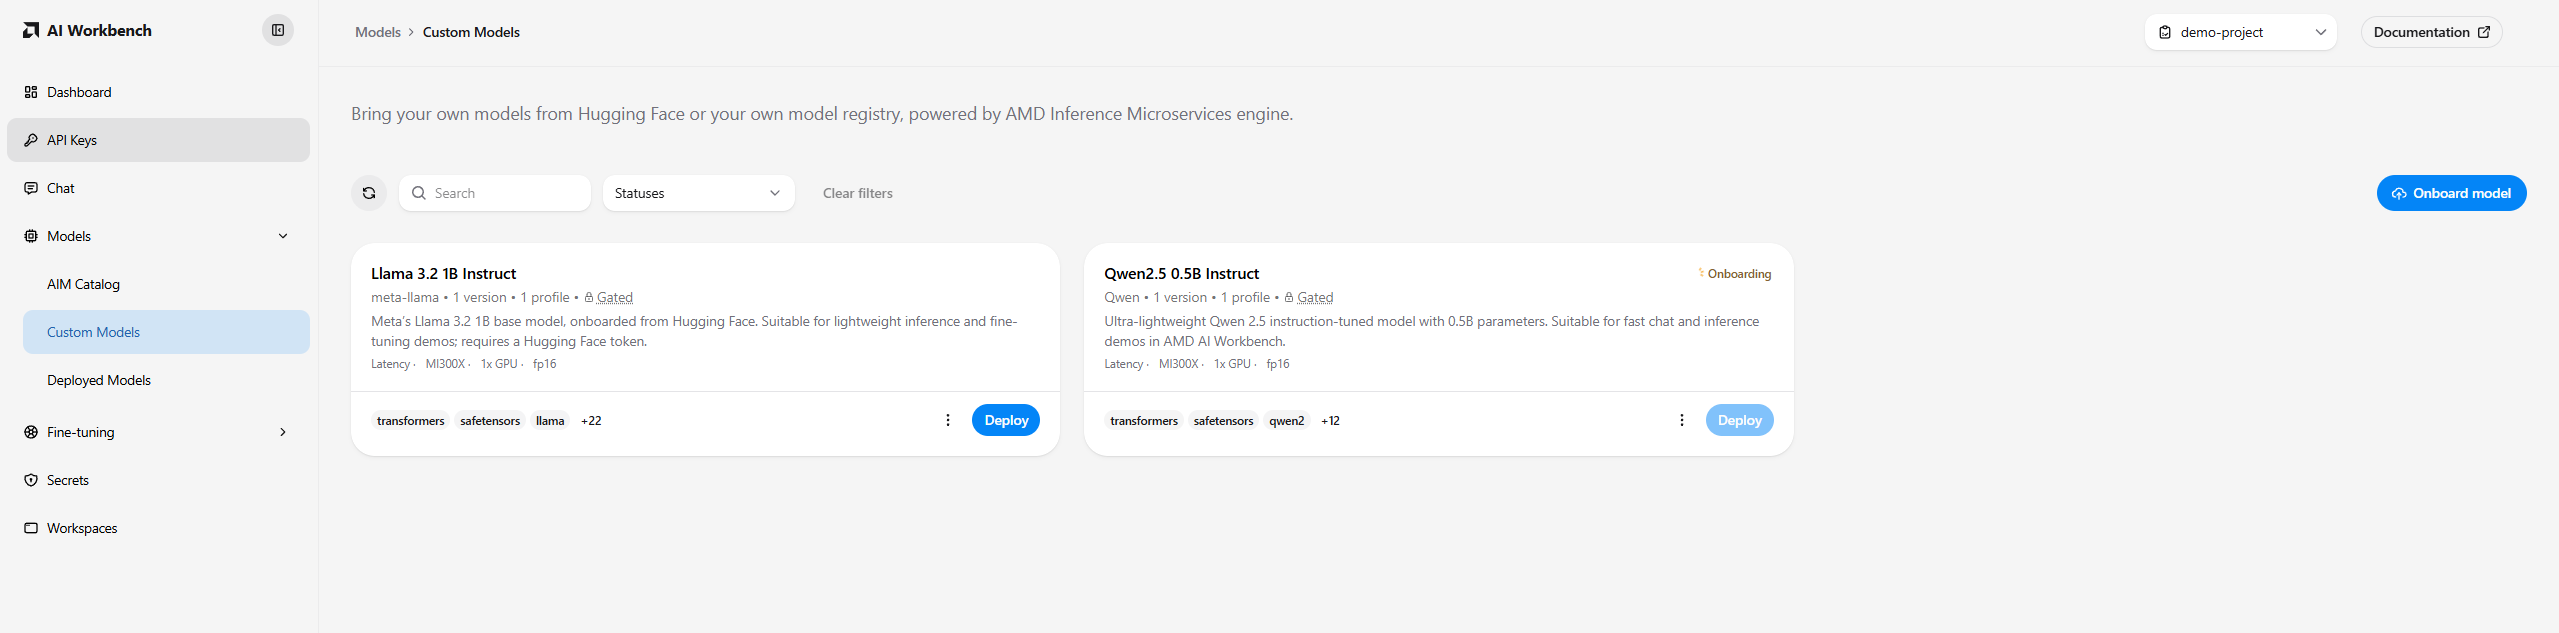
In the sidebar, expand Models and select Custom Models.
Select Onboard model in the toolbar.
This opens the Add new model wizard, which guides you through three steps: Model source, Model information, and Runtime profile.
Step 1: Choose a Source and Preview#
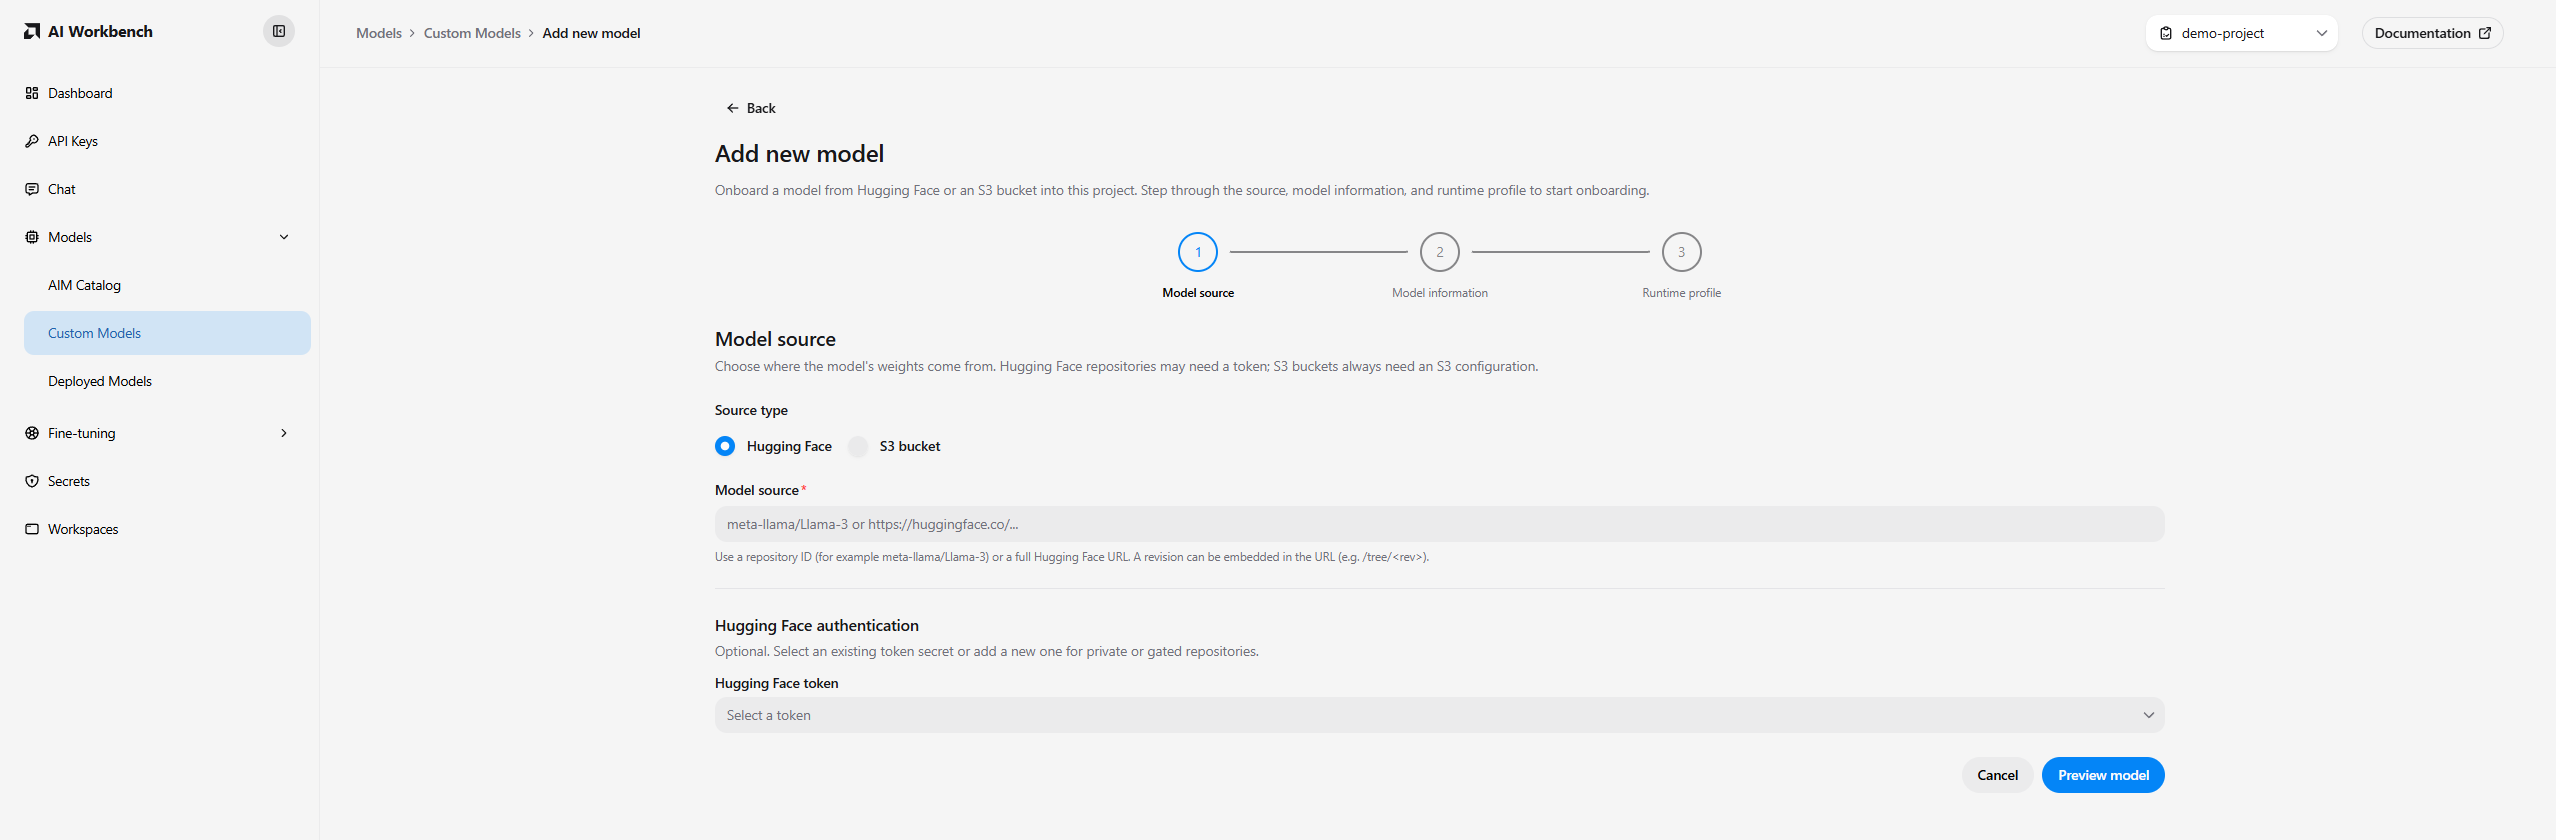
In the Model source step, use the Source type radio buttons at the top of the form to choose where the model’s weights come from: Hugging Face or S3 bucket. The Model source field, authentication section, and helper text below update to match your selection. Switching source types clears the previous inputs so credentials from one source cannot be sent with the other.
Preview from Hugging Face#
Enter the repository ID or Hugging Face URL of the model you want to onboard.
If the repository is private or gated, select an existing Hugging Face token secret, or add a new one. Public repositories do not require a token.
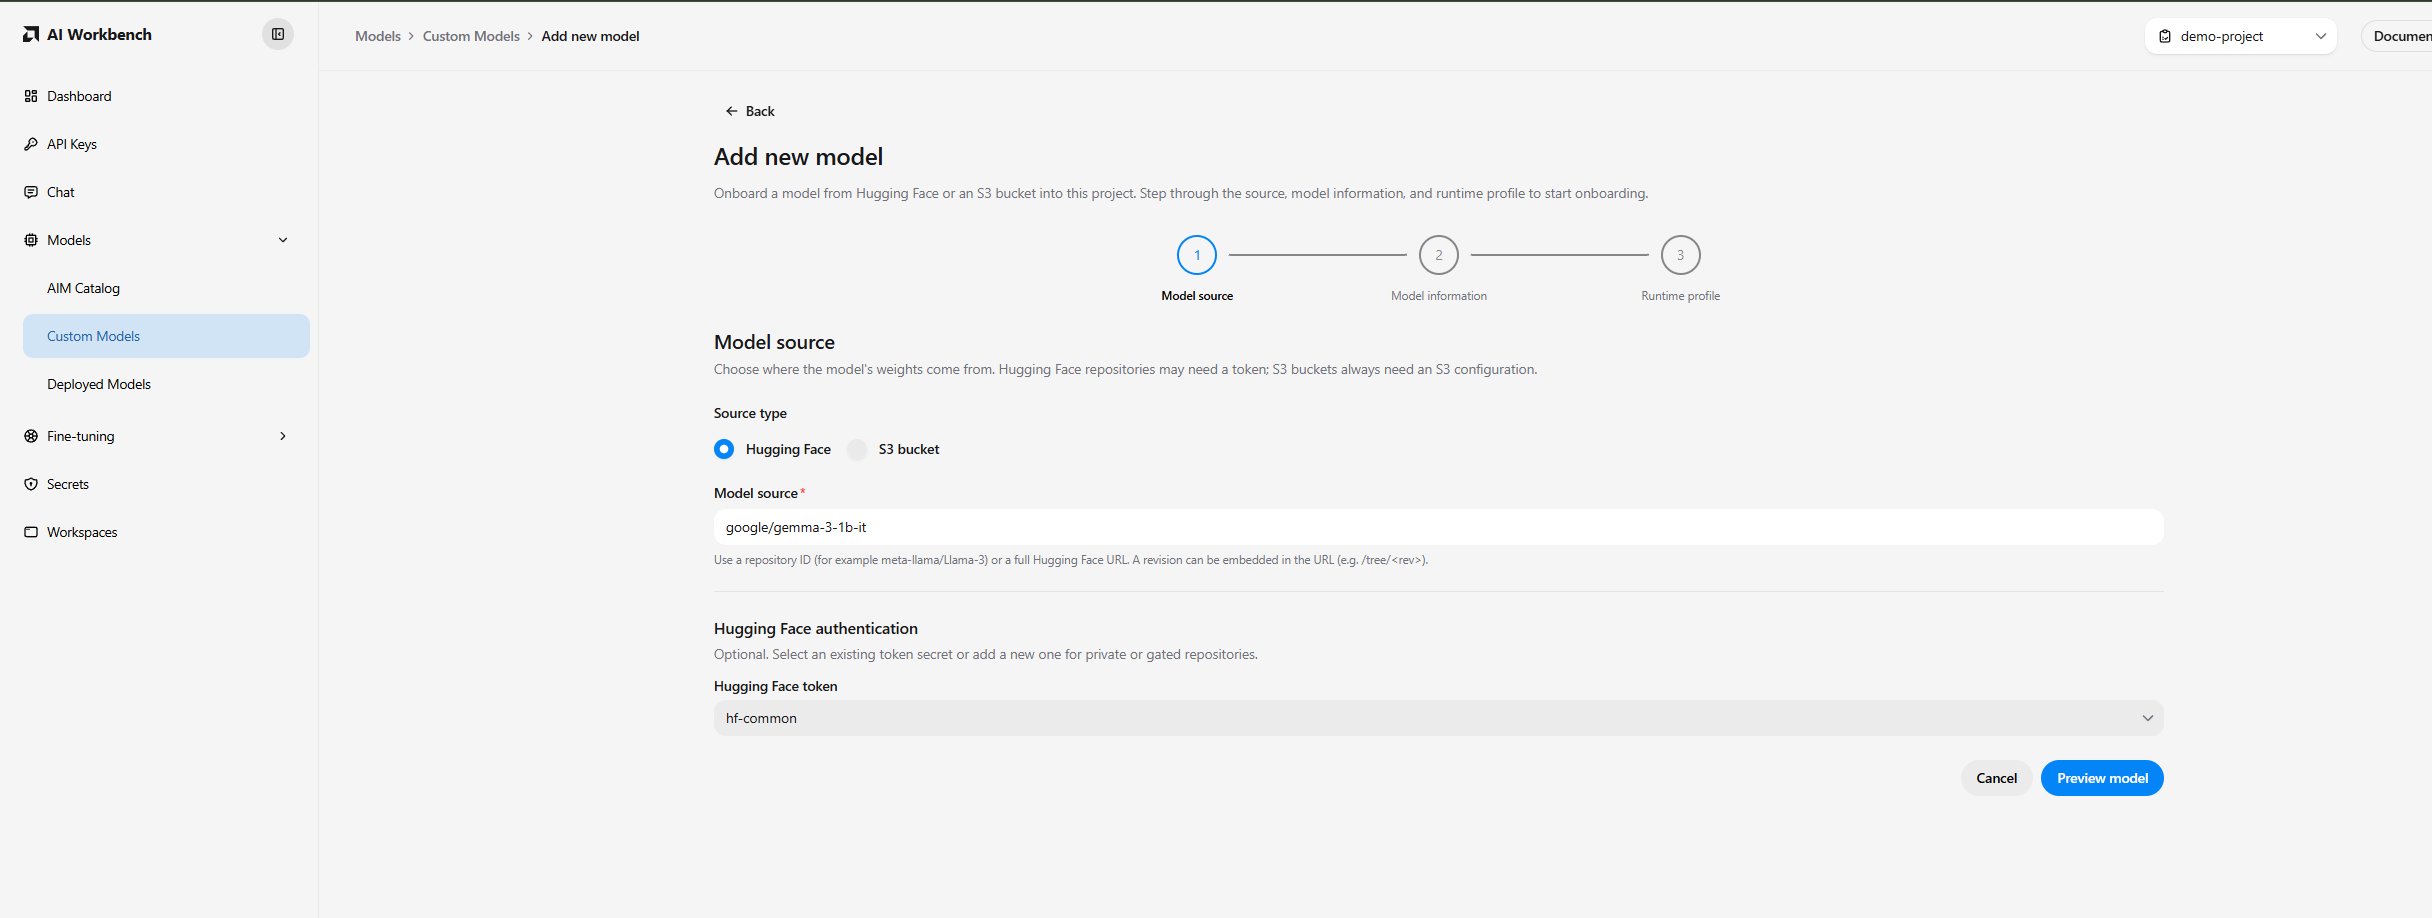
Select Preview model to fetch the repository’s details from Hugging Face. Preview is read-only — nothing is imported or changed in your project yet. When the source resolves successfully, the wizard advances to Model information with the details it found filled in for you to confirm: the resolved canonical name, a suggested display name and description from the model card, and the model’s tags.
Important
When a Hugging Face token is needed: Gated and private repositories require a Hugging Face token to read their metadata during preview and to access the repository when the model is deployed. If you preview a gated model without a token, the Workbench cannot access it and asks you to provide one. Public models work without a token.
Preview from an S3 bucket#
Enter the S3 URI that points at the folder holding your model files — for example, s3://my-bucket/path/to/model.
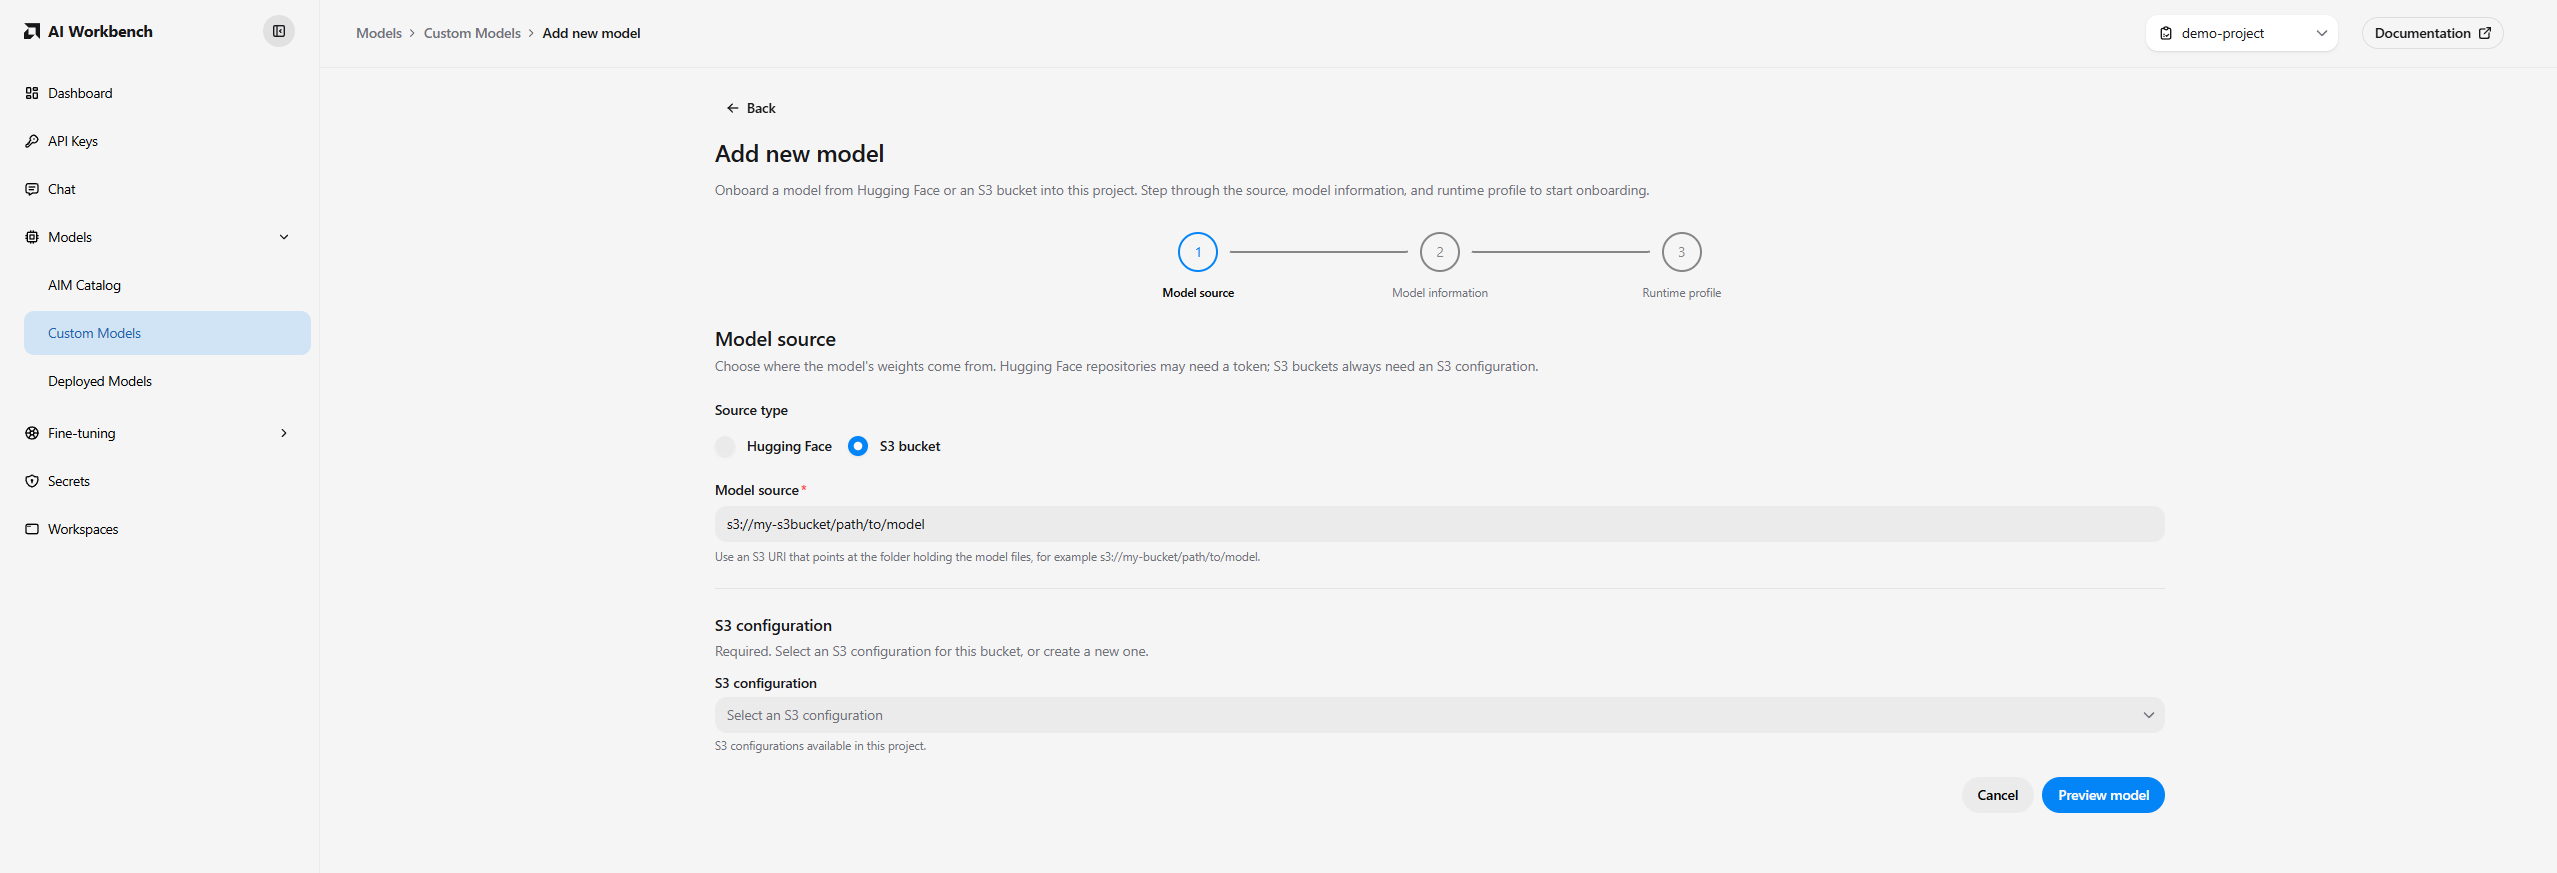
Select an S3 configuration for the bucket. S3 access is never anonymous: you must pick a configuration before previewing. If your project does not have one yet, choose Add new S3 configuration to create it inline:
Enter a name for the configuration.
Select the S3 credentials secret that holds the Access Key ID and Secret Access Key.
Optionally set the S3 endpoint URL and region. Leave the endpoint blank to use the platform’s built-in object storage.
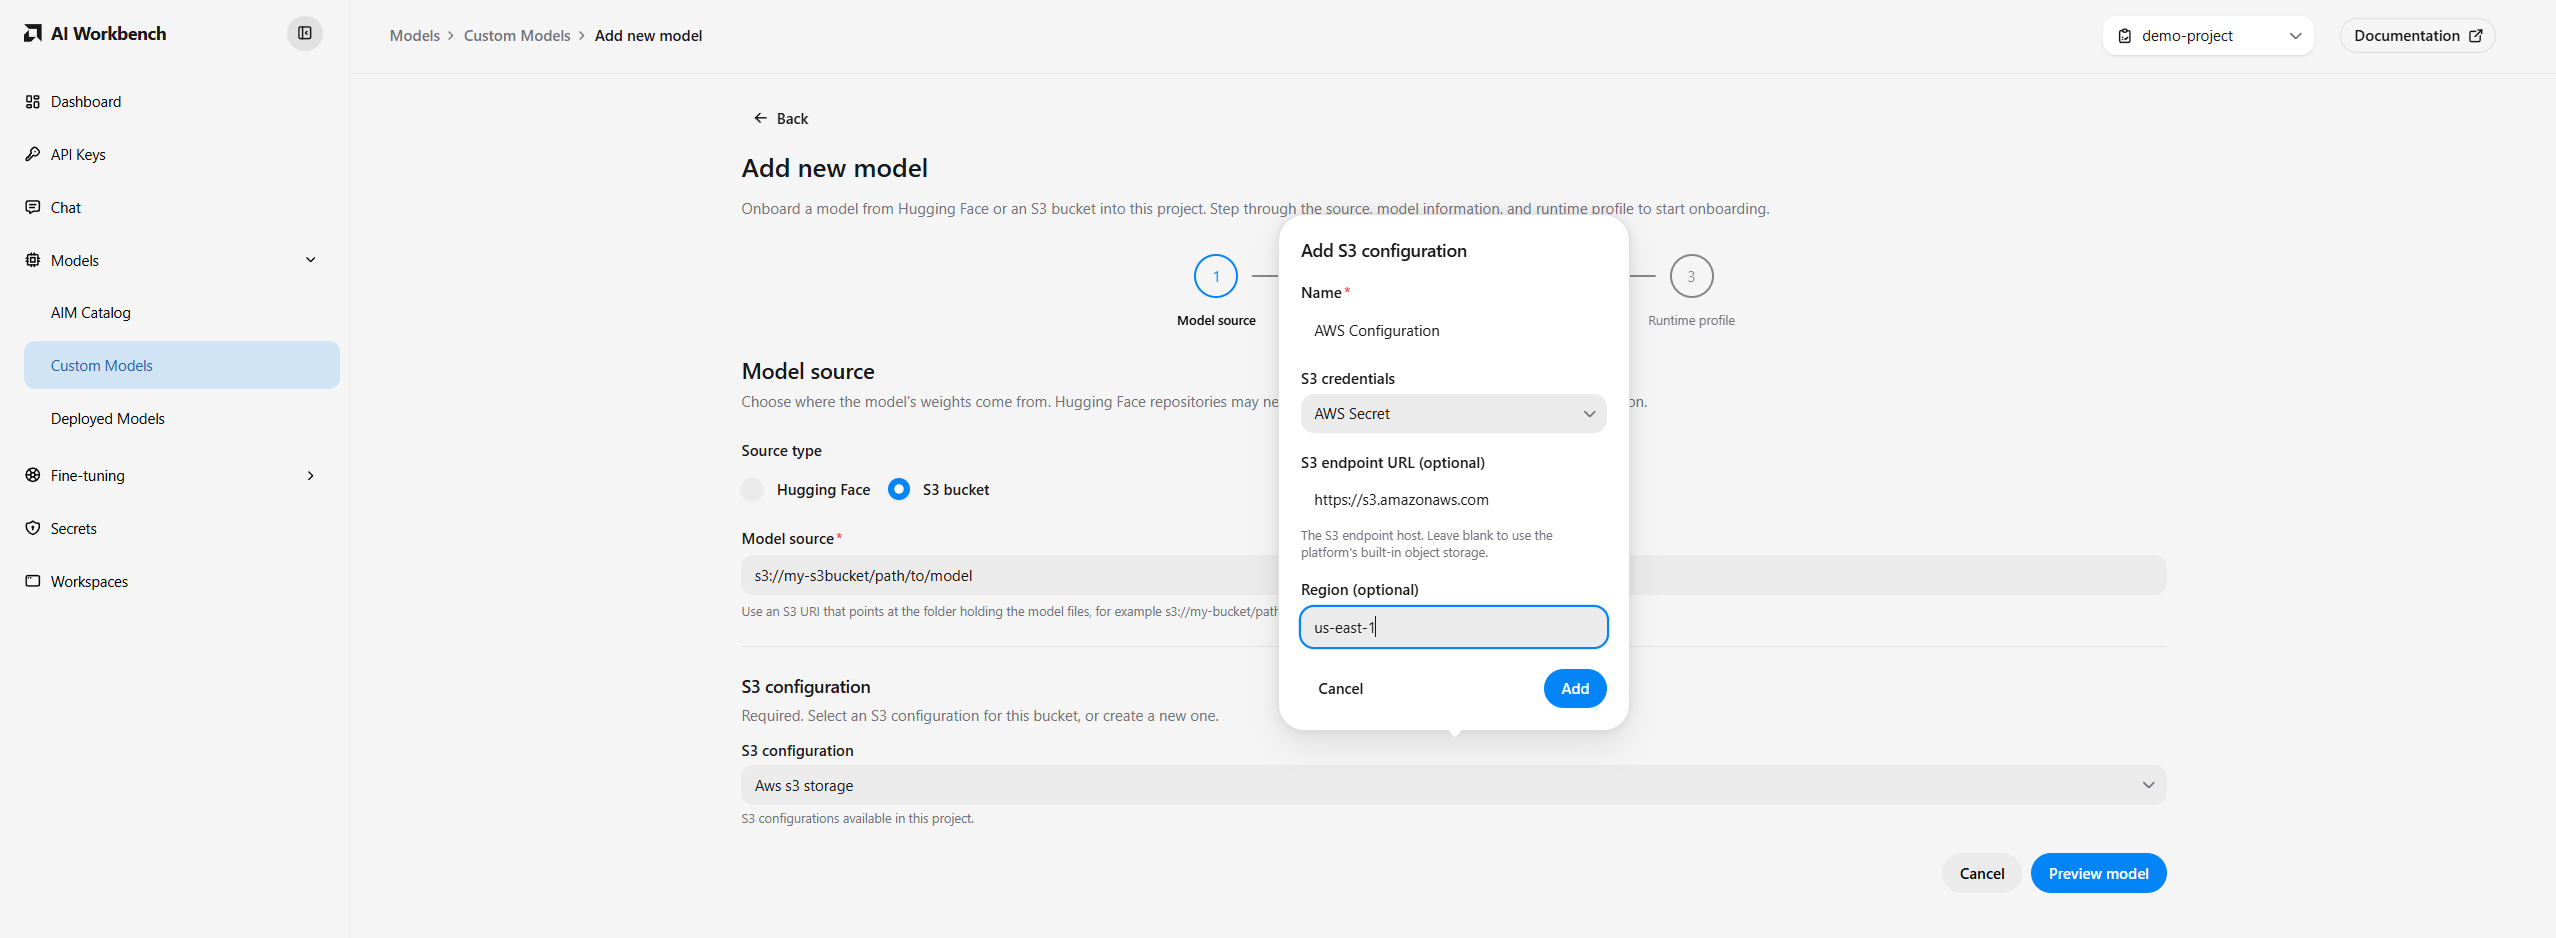
Select Preview model to validate the URI and list the files at that prefix. Preview is read-only — nothing is imported or changed in your project yet. When the source resolves successfully, the wizard advances to Model information with a suggested display name (derived from the folder name), any tags discovered from a README.md model card in the folder, and the canonical name set to the S3 URI you entered.
Note
Preview warnings for S3: If recommended files are missing — such as config.json, tokenizer files, or *.safetensors weight files — the Workbench shows warnings during preview. Warnings do not block you from continuing, but onboarding or deployment may fail later if the folder is incomplete. Address missing files in object storage before deploying.
Note
S3 credentials must remain valid through deployment, not just preview. If keys are rotated after onboarding, update the S3 secret and configuration before deploying.
Step 2: Confirm Model Information#
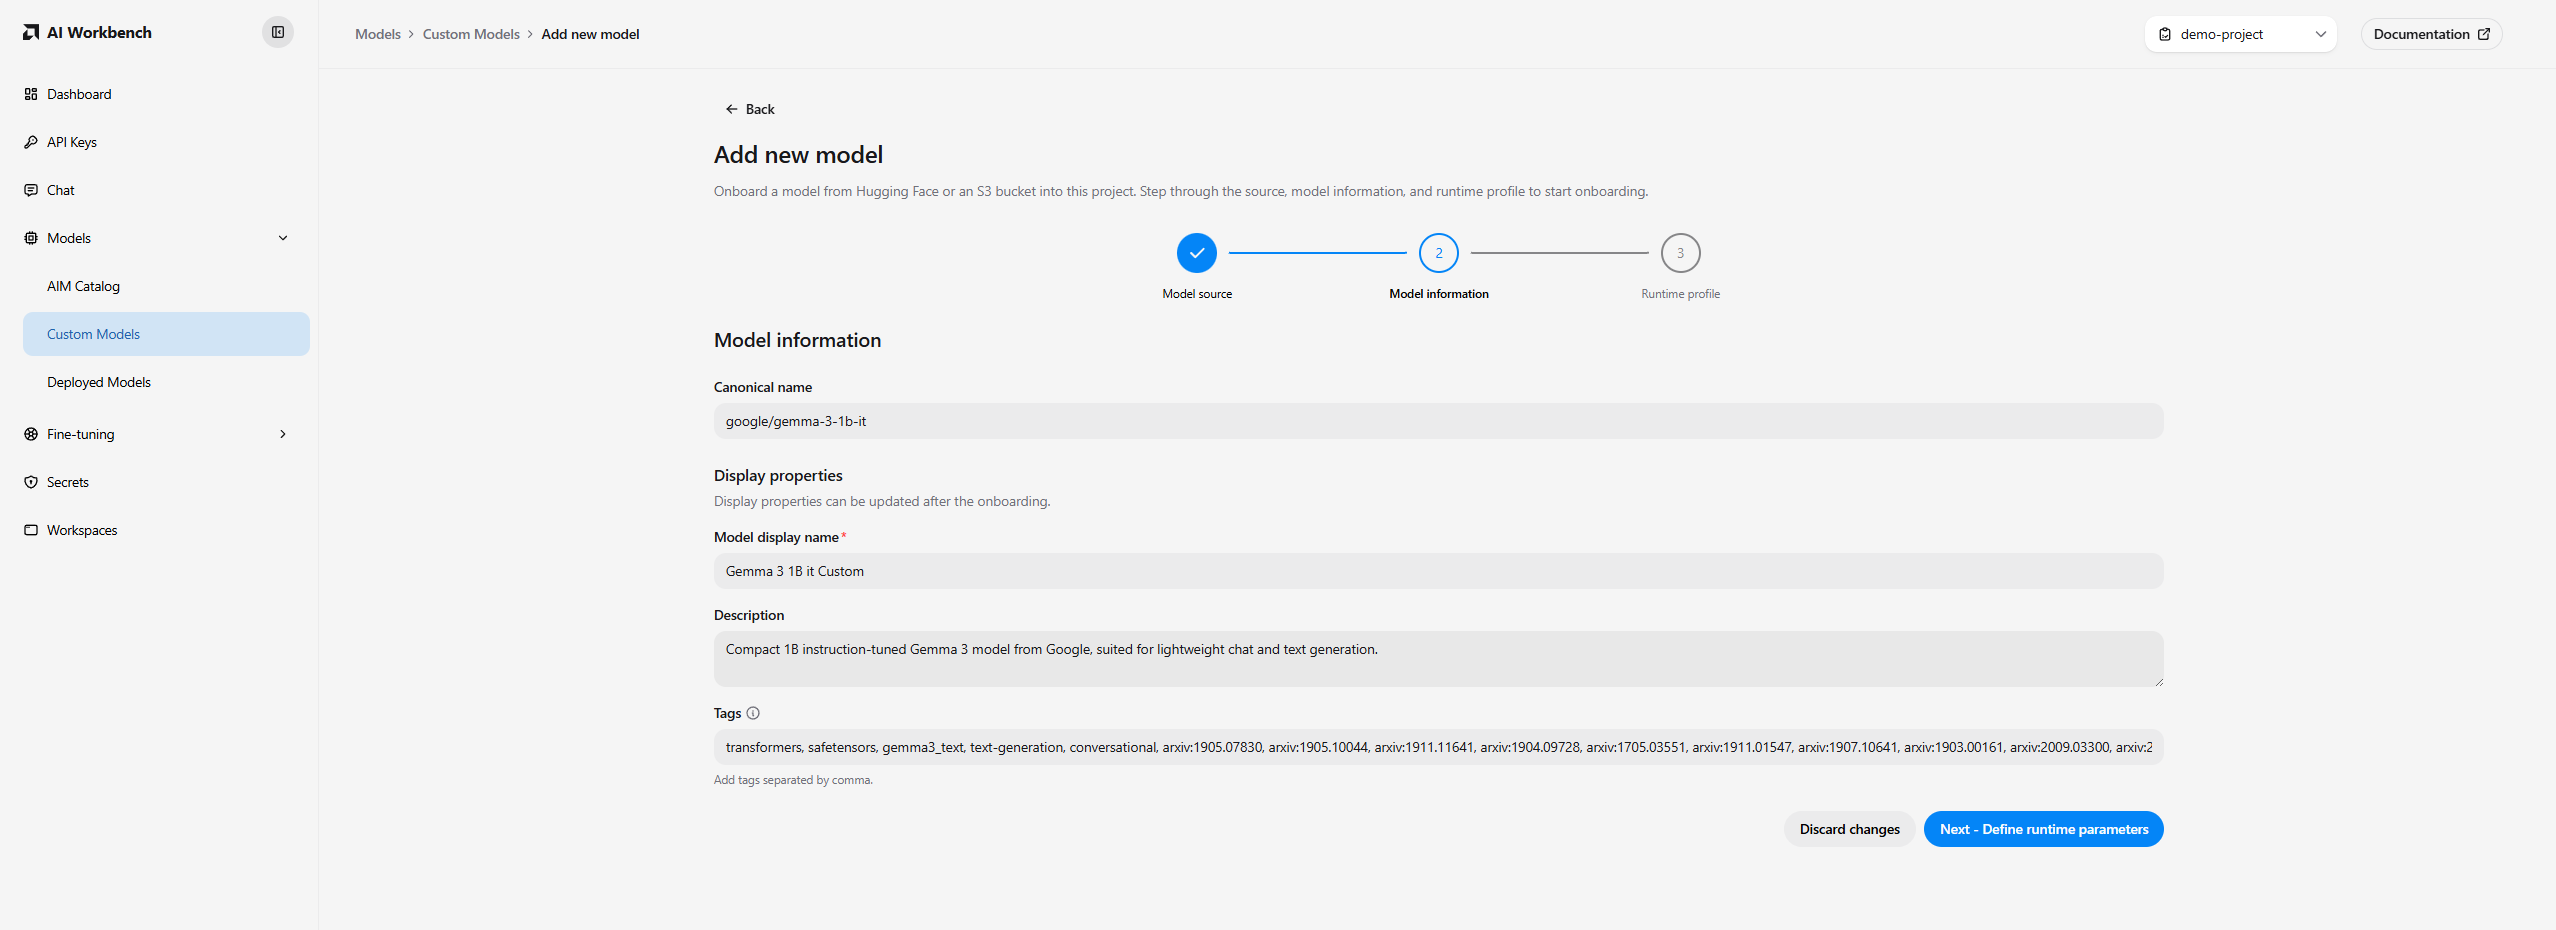
The Model information step shows the canonical name as read-only — this comes from the source and cannot be changed. For Hugging Face sources it is the repository ID; for S3 sources it is the full s3:// URI. Below it, you can review and adjust the display properties that the preview suggested:
Model display name — the human-readable title shown on the model card. It is prefilled from the model card (Hugging Face) or folder name (S3) and must not be empty. You can keep the suggestion or replace it.
Description — a short catalog description, prefilled from the model card when available.
Tags — comma-separated labels used for search and filtering.
Note
Display properties can be updated after onboarding from the model’s settings, so you don’t have to get them perfect here.
Continue to the runtime profile step when you are satisfied with the metadata.
Step 3: Select a Container Image and Runtime Profile#
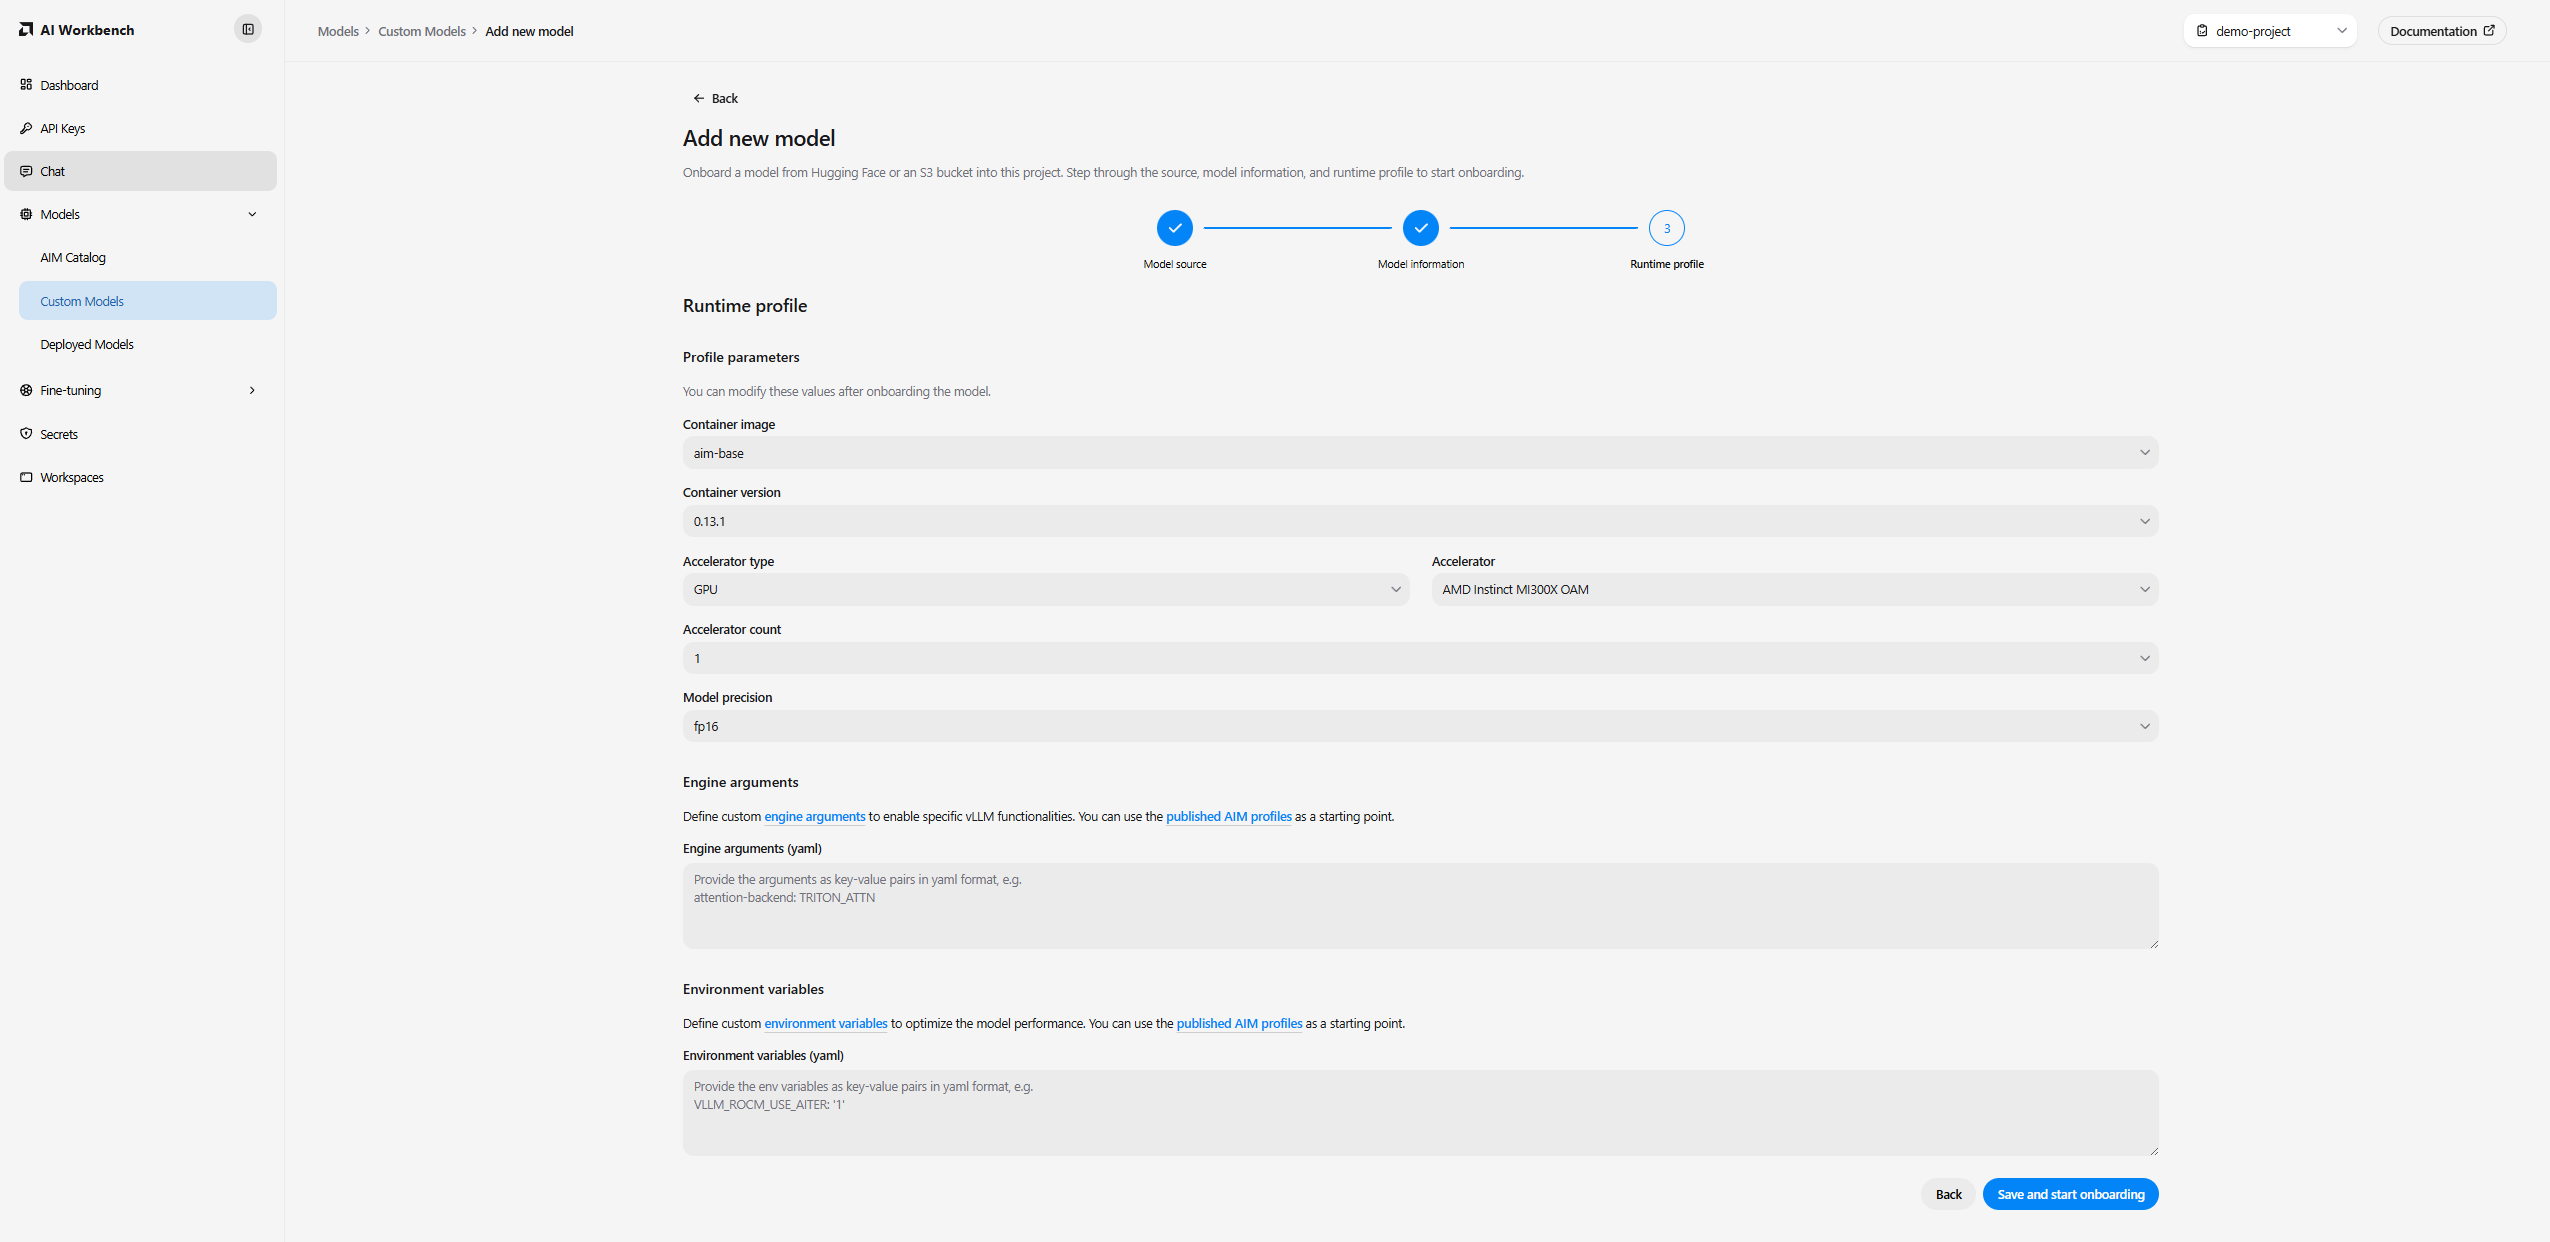
In the Runtime profile step, choose the container image that will serve your model and the hardware profile it runs on. What you set here becomes the model’s Default profile — the configuration it uses unless you deploy it with a different one. The wizard presets these from the options detected for your cluster, so for most models you can review the suggested values and continue. Under Profile parameters you select:
Container image — the image that serves your model.
Container version — the image version (shown when the selected image offers versions).
Accelerator type and Accelerator — the hardware your model runs on.
Accelerator count — how many accelerators to use.
Model precision — the numeric precision for the model.
The step also includes optional Engine arguments and Environment variables sections for advanced tuning. You can leave these empty to start onboarding and adjust them later.
Tip
For most models, selecting a supported container image and accepting the suggested profile parameters is enough to start onboarding. You can refine engine arguments, environment variables, and other overrides later, and you can add further profiles — for example one tuned for throughput on more accelerators — without re-importing the model. See Custom Model Profiles.
Start Onboarding#
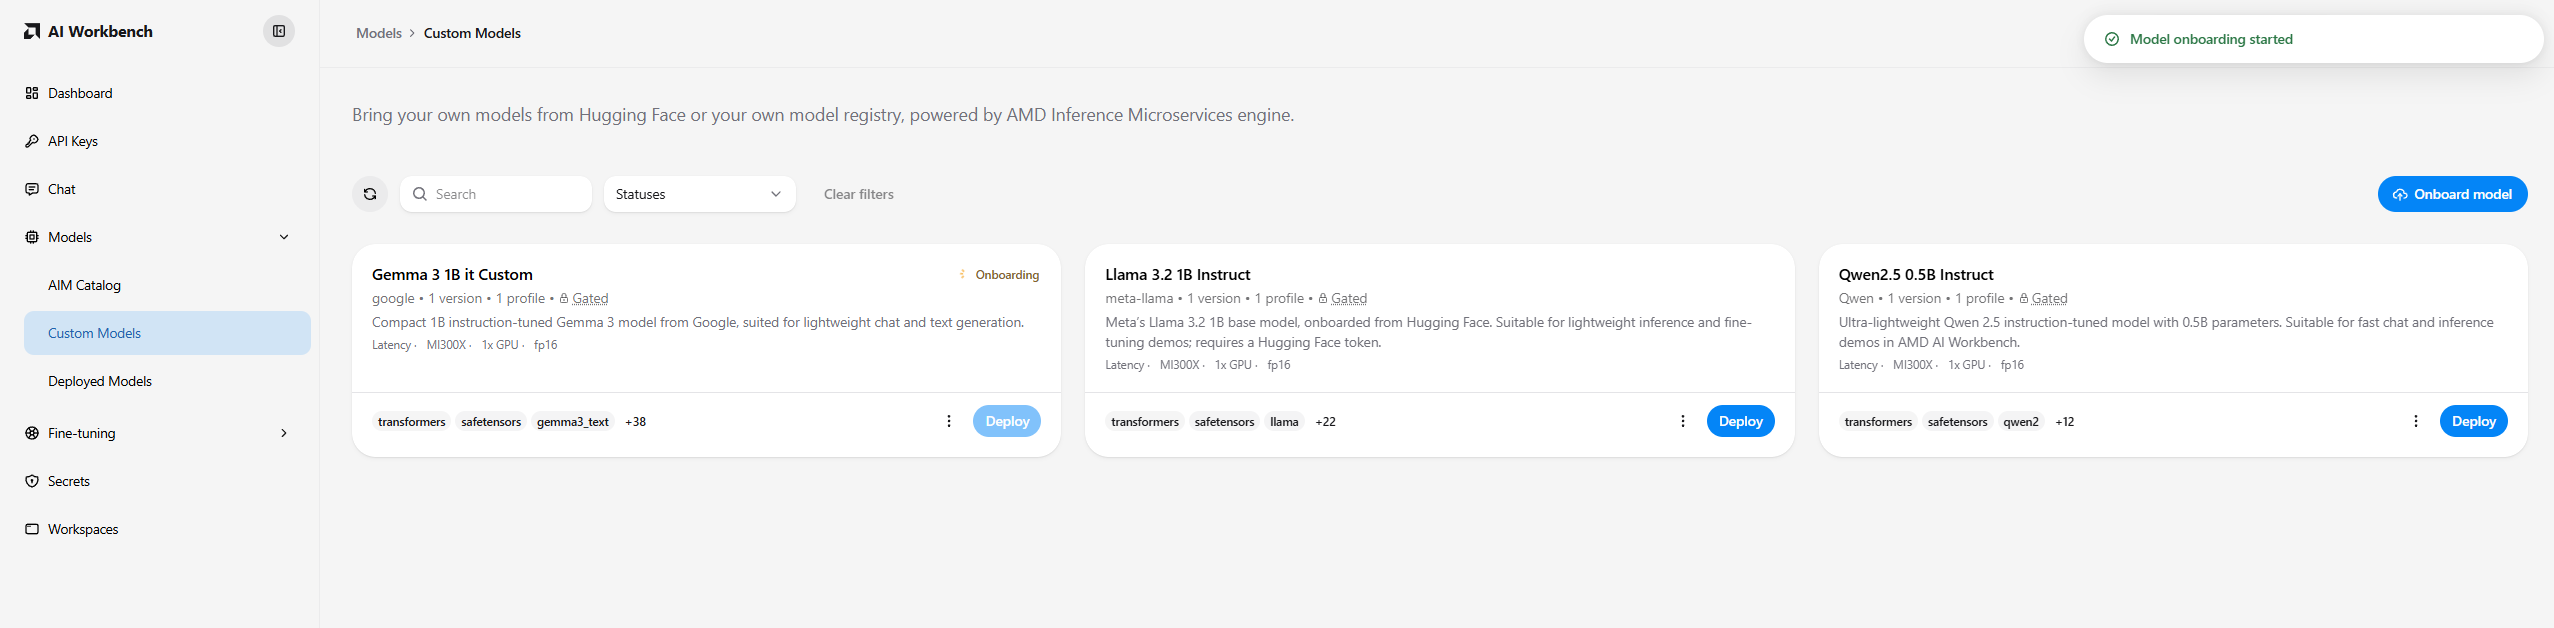
Select Save and start onboarding to begin. The Workbench validates your selections and re-checks the source. You are returned to the Custom Models page, where your new model appears with its onboarding in progress.
What happens next depends on the source:
Hugging Face — the Workbench re-verifies the repository against the Hub and registers the model with a reference to that repository. Weights are not copied into project storage during onboarding; the inference service fetches them from Hugging Face when you deploy.
S3 — the Workbench re-validates the URI and credentials and registers the model with a reference to your object-storage folder. Weights are not copied into project storage during onboarding; the inference service reads them from the S3 location you specified when you deploy.
Onboarding itself is usually quick because no weight download occurs at this stage. You don’t need to keep the wizard open — preparation continues in the background. On a new project, Onboarding can take several minutes while the platform discovers supported runtime profiles for your cluster; wait until the status clears and Deploy is enabled before deploying.
Track Onboarding Status#
Each custom model card shows its current status:
Onboarding — the model is being prepared after registration (for example, while the runtime profile is emitted). This is the usual status immediately after you start onboarding.
Importing — a legacy status for older models that tracked a separate weight-import step. New onboarded models typically show Onboarding instead.
Failed — onboarding did not complete. See Troubleshooting below.
When a model is ready to deploy, its card shows no status pill and the Deploy button is enabled. Weight download happens when you deploy, not during onboarding — the first deployment of a large model can take several minutes while weights are fetched and loaded.
Once a model is ready, you can deploy it as an inference service and connect to it like any other model — see Deploy a Custom Model.
Troubleshooting: Common Situations#
Gated or Private Hugging Face Models#
If a model is gated, you must first request and be granted access on Hugging Face for the account that owns your token. Even with a token, onboarding fails if that account has not been approved for the repository. Confirm access on Hugging Face, then preview and onboard again.
Hugging Face Access or Authentication Errors#
If preview or onboarding reports that the model cannot be accessed:
Check that the repository ID or URL is spelled correctly and points to a model repository.
For gated or private models, confirm you selected a Hugging Face token secret, and that the token is valid and still has access.
If you recently created or rotated your token, add the updated token as a new secret and select it.
Note
A private or gated repository can appear as “not found” when your token is missing, invalid, or lacks access to it — the repository is simply not visible to that token. If you’re sure the repository exists, check your token before assuming the source is wrong.
See Secrets for managing Hugging Face token secrets.
S3 Access or Path Errors#
If preview or onboarding reports that the S3 source cannot be accessed:
Confirm the URI uses the form
s3://bucket/prefixwith a non-empty prefix after the bucket name.Verify the folder exists and contains model files at that prefix.
Confirm the S3 configuration points at valid credentials with read access to the bucket.
If you use an external S3 endpoint, check that the endpoint URL and region on the configuration match your provider.
If credentials were rotated, create a new S3 secret and update or recreate the S3 configuration that references it.
Incomplete S3 Model Layout#
If preview showed warnings about missing files, upload the recommended artifacts to your object storage folder before deploying. At minimum, include config.json, a tokenizer file, and *.safetensors weight files. Sharded models also need a *.safetensors.index.json index file.
Duplicate Display Names#
Reusing an existing custom model’s display name does not create a separate model. When you onboard a model under a name that already exists and points to the same source, the existing model’s metadata and profile settings are overwritten. If the name is reused for a different source, the save is rejected so the wrong model is not modified.
Important
Known limitation: the Model information step warns you when the display name you entered already belongs to another custom model in the project. The warning does not block you, but saving may overwrite that model’s metadata and profile settings, or be rejected if the name points to a different source — choose a different display name if you want to keep both models. This is a known restriction; custom models are not yet versioned the way the Standard Catalog is.
Stale Hugging Face Preview#
The Workbench pins the exact version of the repository it showed you during preview. If the repository changes on Hugging Face between previewing and onboarding, onboarding is rejected so you never onboard a different version than the one you reviewed. If this happens, preview the model again to refresh the details, then onboard from the updated preview.
S3 sources do not use revision pinning — the canonical name is always the URI you entered. If the contents of that folder change after onboarding, the deployed model may load different weights than you originally reviewed.
Onboarding Failed#
If a model shows a Failed status:
Hugging Face — registration or profile preparation did not complete. Common causes include a revoked token, lost access to a gated repository, or a Hub verification failure. Confirm access and your token, then re-onboard the model.
S3 — registration or profile preparation did not complete. Confirm the URI, credentials, and model layout, then re-onboard.
You can also delete the failed model and start again.