How to Deploy a Model and Run Inference#
Training AI models and developing your own models are essential parts of AI workflows, but eventually they lead to using the models in your business applications. Solving problems, making predictions, and processing data is called inference. This is the culmination of AI workflows, providing you with business value.
In short, an AI model requires data for training it properly. The model applies learned patterns to analyze new inputs. With new data, the model generates predictions, classifications, or other types of responses. In the end, the results are used to make decisions and provide services.
Utilizing AI models in business applications is essential in any AI development workflow. This simple tutorial guides you to pick a model, deploy it and trial its endpoints via the JupyterLab workspace. This tutorial takes you through the following steps:
Deploy a model from the model catalog.
Find information about the model endpoints.
Connect to a model endpoint for inference.
1. Deploy a model#
Navigate to the Models page and go to the AIM Catalog tab. Find a model with the tag Instruction. Chat models are fun, but their responses can be too conversational and not very helpful for specific tasks. Instruction models are fine-tuned to be helpful and try to answer questions or act based on the given instructions.
As instructed, choose one of the models that has a tag Instruction or one that says Instruct in its name. Proceed with deploying the model by clicking Deploy.
Important
Hugging Face Token Required: You will need to provide a Hugging Face token for deploying and downloading the model. You can either create a new token or select an existing one from your project secrets. Find instructions for adding Hugging Face tokens in this tutorial.
The deployment might take a while, so it’s better to stretch your legs or do something else in the meantime. You can follow the deployment progress on the Workloads page or the Deployed models tab.
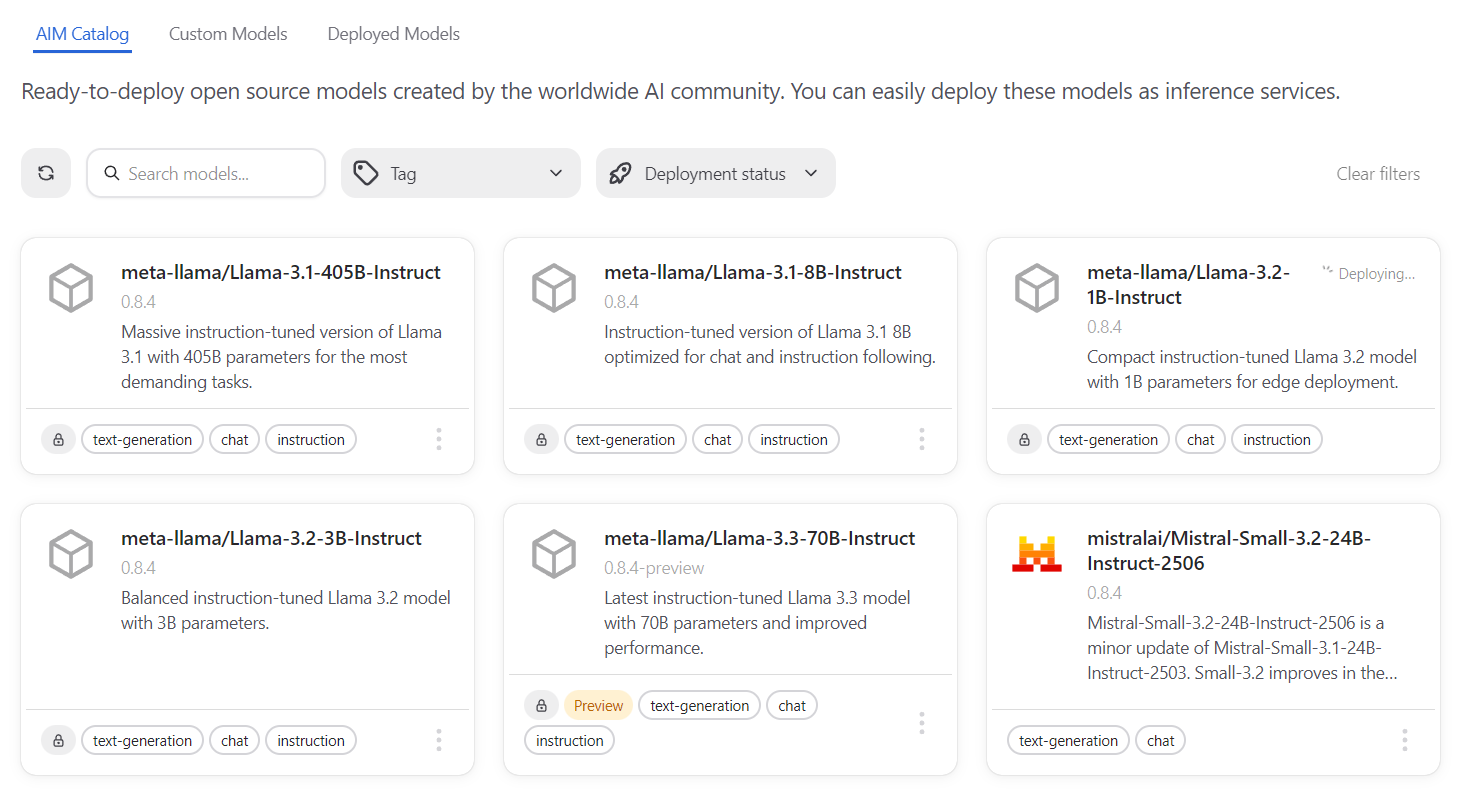
The AIM Catalog page provides you with a variety of AMD Inference Microservices (AIMs) - optimized inference containers with different capabilities. You can use the filters to find interesting models for your inference needs. Each AIM includes built-in model caching and is optimized for AMD hardware. Both GPU-based and CPU-based (AMD EPYC™) AIMs appear in the catalog and deploy through the same flow, so the steps above apply regardless of the accelerator type.
Tip
Advanced Deployment Options: The deployment drawer includes additional configuration options such as performance metric selection and experimental deployment profiles. For most use cases, the default settings provide excellent performance. To learn more about these advanced options, see Advanced Deployment Options.
2. Find model endpoints#
You can find model information on the AIM Catalog page. Find the deployed model, open the action menu (three dots) and it should have a “Connect” option. Clicking it reveals a dialog window giving you the required information for connecting to the model for inference.
Alternatively, you can find the deployed model in the Deployed models tab or as a workload in the Workloads section.

External URL is the address you need for connections outside of your current platform.
Internal URL is the address that is used for connections inside your current platform.
The content box holds sample code for testing out the model. Choose the Python tab and click the copy button in the top right corner. The copy button looks like two overlaid squares.
If you want to end the tutorial here, you can just click the “Open in chat” button and continue with testing your new AI model.
3. Connect to the endpoint#
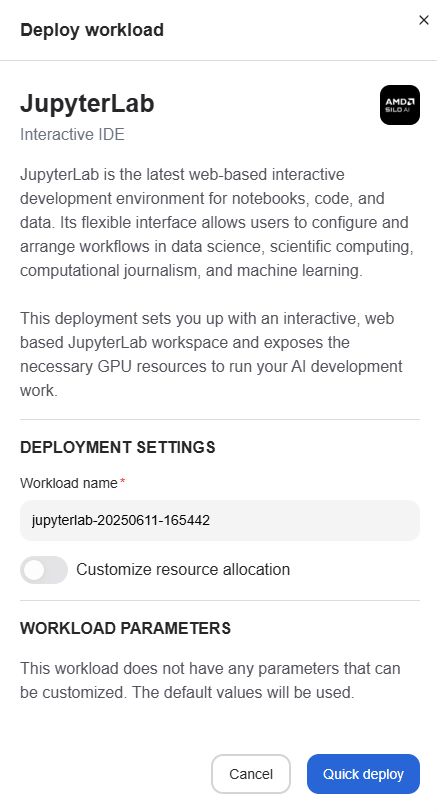
To test the model endpoints, the easiest way is to go to the Workspaces page. On the page, look for JupyterLab and click “Deploy”. To keep things simple, click “Deploy” at the bottom of the newly opened drawer. You can change the name or allocated resources, but those aren’t necessary for testing the workspace.
After the short deployment process, you can click the “Launch” button either in the drawer or, if you closed it, on the Workspaces page. This will open a JupyterLab browser tab, where you can run Python code or do other types of development inside the platform.
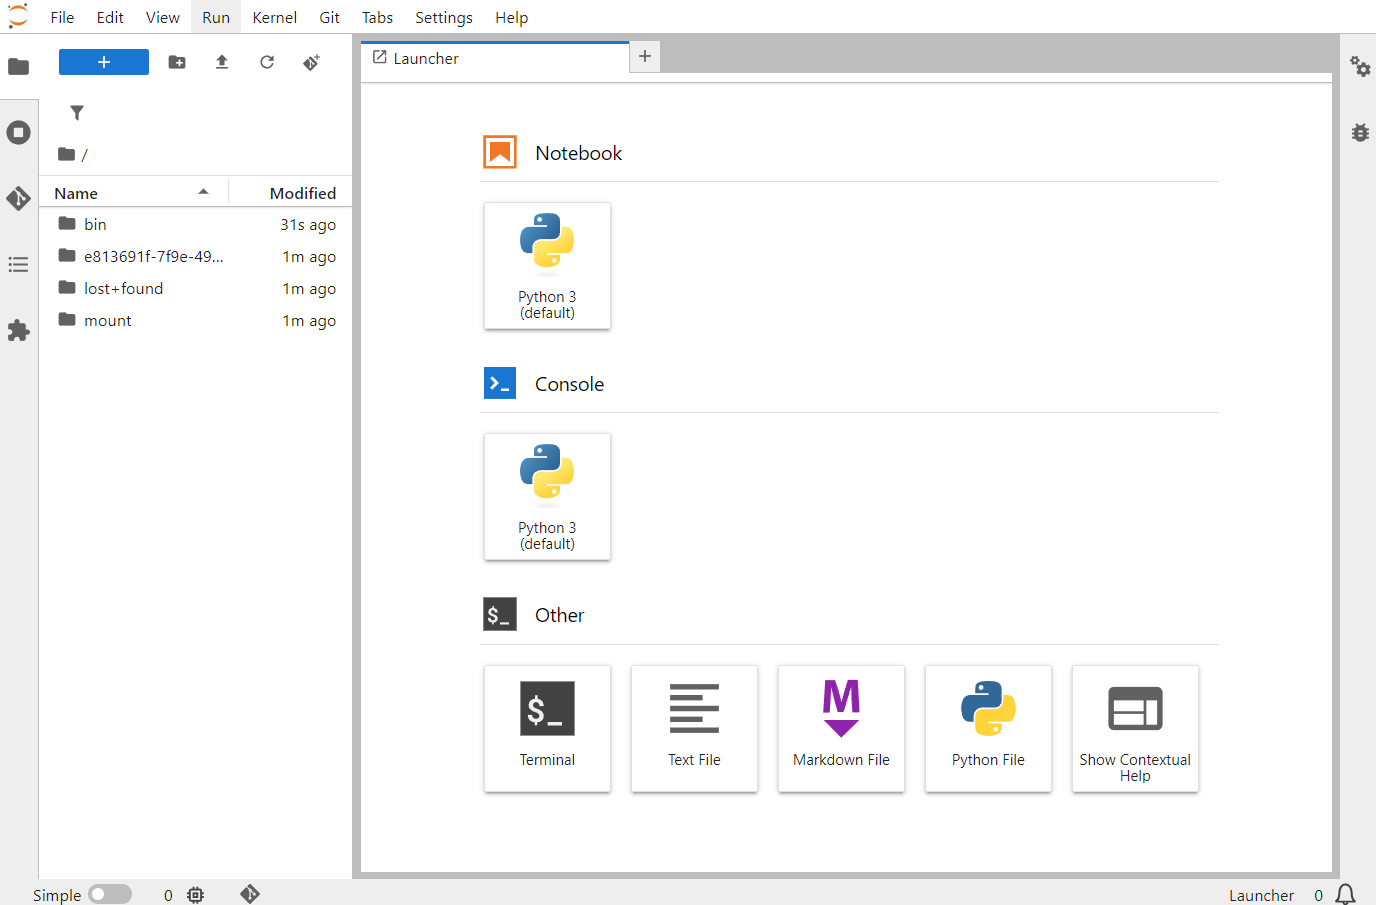
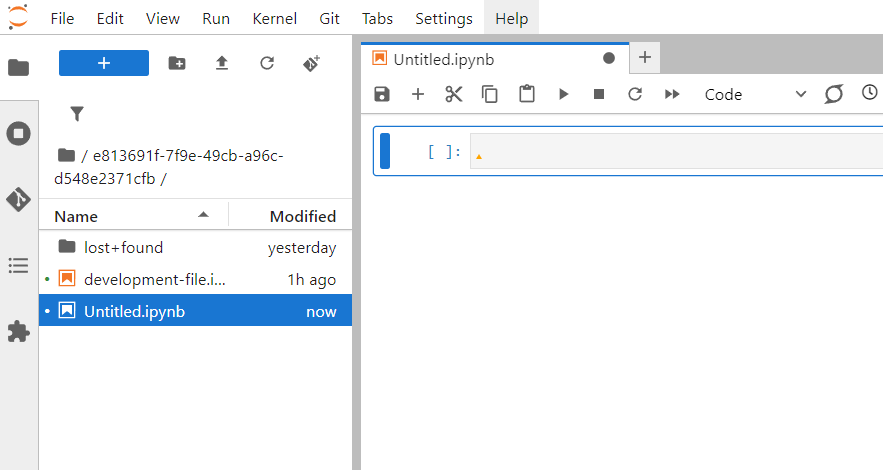
Be sure to open the directory named with a UUID (a long alphanumeric string). This directory’s contents shouldn’t be wiped if something unexpected happens to the JupyterLab deployment. Click the “Python 3” tile in the right side pane. This will create an empty Python file; in JupyterLab these are called Python notebooks. You can name the file by right-clicking the filename in the left file list or in the tab above the code window.
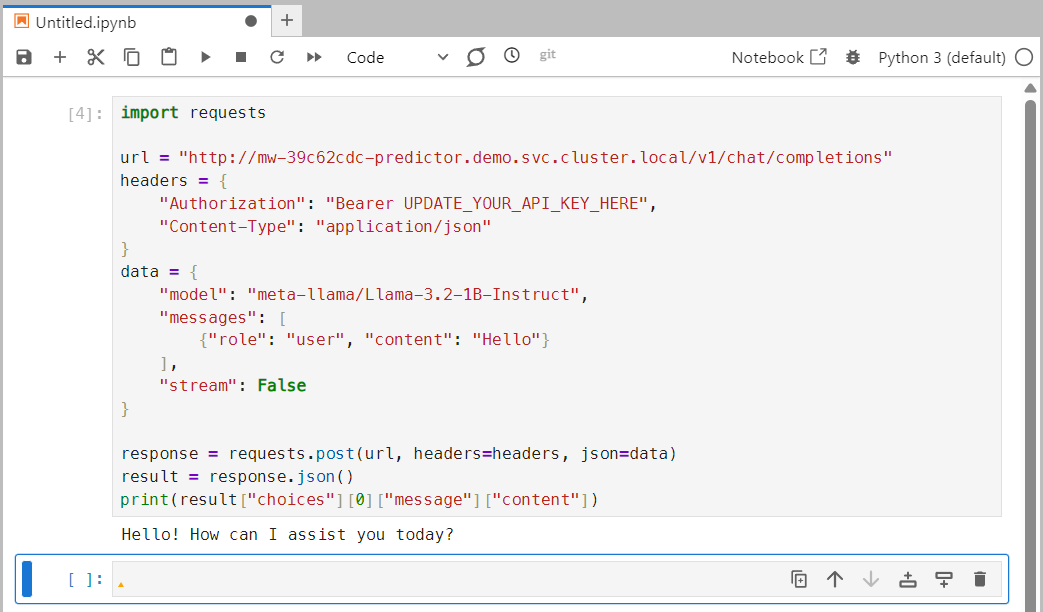
Paste the previously copied Python code into the code window. A few notes about the code:
urlis the URL mentioned previously in the connection parameter dialog window.The JSON area has a few lines of note:
modelis the model’s name prepended with a path to the model.contentis a message sent to the chat model.
Click the play/run button in the top area of the code window. The button looks like a right-facing triangle. This sends the message contents to the model and returns a response; the first request might take a moment. In the response, you can spot a line titled ‘content’. This is the chat response from the model.
Attention
If you are using JupyterLab notebook for the first time, you might have to install the requests Python package. In the first page, click Terminal tile and run pip install requests in the newly opened terminal window.
For a nice greeting “Hello”, the chat model should answer you with something nice as a response. You can change the “content” field in the initial JSON, click the play/run button once more, and expect another kind of response.
You should be able to use the same code in external applications. Just be sure to replace the url variable with the external URL found in the connection parameters. This concludes the tutorial.