Project Settings#
The project settings page allows you to manage access and resources for your project.
On the Projects page, select a project by clicking it. Once a project is selected, the Actions button appears; open the Actions menu (⋯) and choose Edit settings to open the project settings page. The page is organized into tabs — Quota, Storage, Secrets, Users, and Details — each described in the sections below. Workload preemption and project deletion controls live on the Details tab.
For definitions of terms used here and in the related tutorials, see Glossary: Projects and tutorials.
Project Quotas#
A quota is a minimum set of resources guaranteed to a project, i.e., a floor, not a cap. Projects can use more than their quota when spare capacity exists, so teams get a guaranteed share without blocking use of idle cluster resources by other teams. Without quotas, one project could consume everything and leave others waiting.
In AMD Resource Manager you can set GPU, CPU, memory, and disk quotas per project. New projects start with zero quota for all resources; quotas can be configured once the project is created.
Note
With only one project, quota settings are unnecessary. Quota management matters once you have a second project.
Note
When a project uses more than its quota (by using idle resources), those workloads keep running until the cluster is full. Then workloads from projects which are utilizing more than their quota may be preempted so that workloads in projects with quota can be deployed. This is quota-based preemption: in-quota projects reclaim borrowed resources from those that exceeded their quota. AMD Resource Manager also supports priority class preemption (low, medium, high per workload). See Workload Priority Classes.
Resource sharing and pre-emption#
The behavior above applies to all quota types (GPU, CPU, memory, disk). Workloads running on borrowed resources are suspended when the quota-holding project needs them back and resume when capacity frees up. For long-running jobs on shared resources, use checkpointing to avoid losing progress.
Note
Keywords used here: Resource sharing, borrowed resources, pre-emption, and checkpointing are defined in Glossary: Projects and tutorials. For checkpointing configuration, see Workload checkpointing.
The following steps illustrate how resource sharing and pre-emption work between a low-priority and high-priority project when a high-priority project needs GPUs that are currently being used by the low-priority project and it’s within the quota of the project (allocated GPUs):
Step 1: A low-priority project has 2 GPUs assigned out of 8 total on the cluster; the other 6 GPUs are idle.
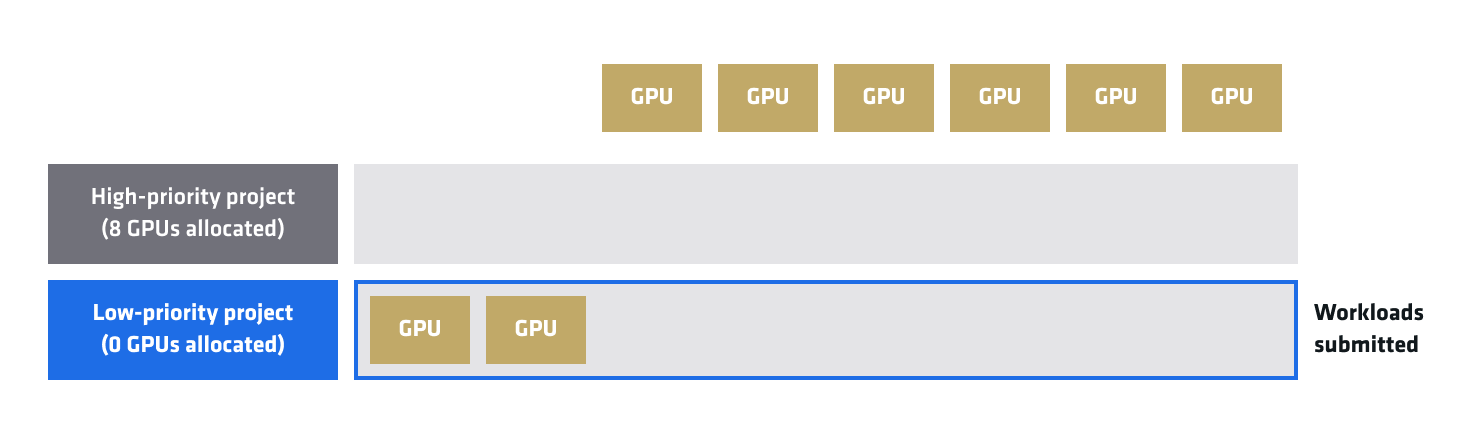
Figure 1: Low-priority project using 2 of 8 total GPUs; 6 GPUs are idle.
Step 2: Workloads are submitted to the high-priority project that require all 8 GPUs.
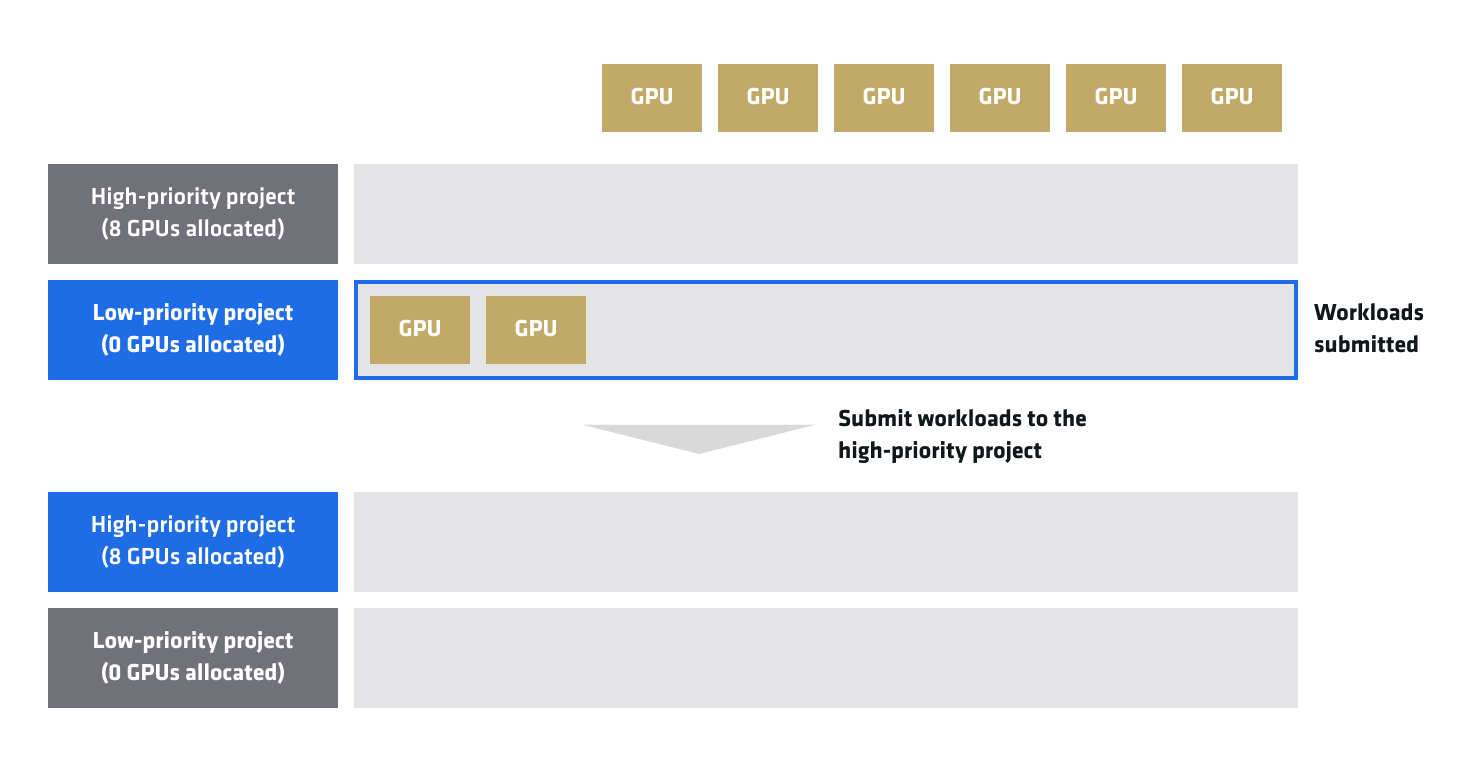
Figure 2: High-priority workloads submitted; 8 GPUs requested.
Step 3: The high-priority project reclaims the 2 GPUs from the low-priority project plus the 6 that were free (8 in total). The low-priority project’s workloads move to a pending state until the high-priority workloads are no longer utilizing the full 8 GPUs.
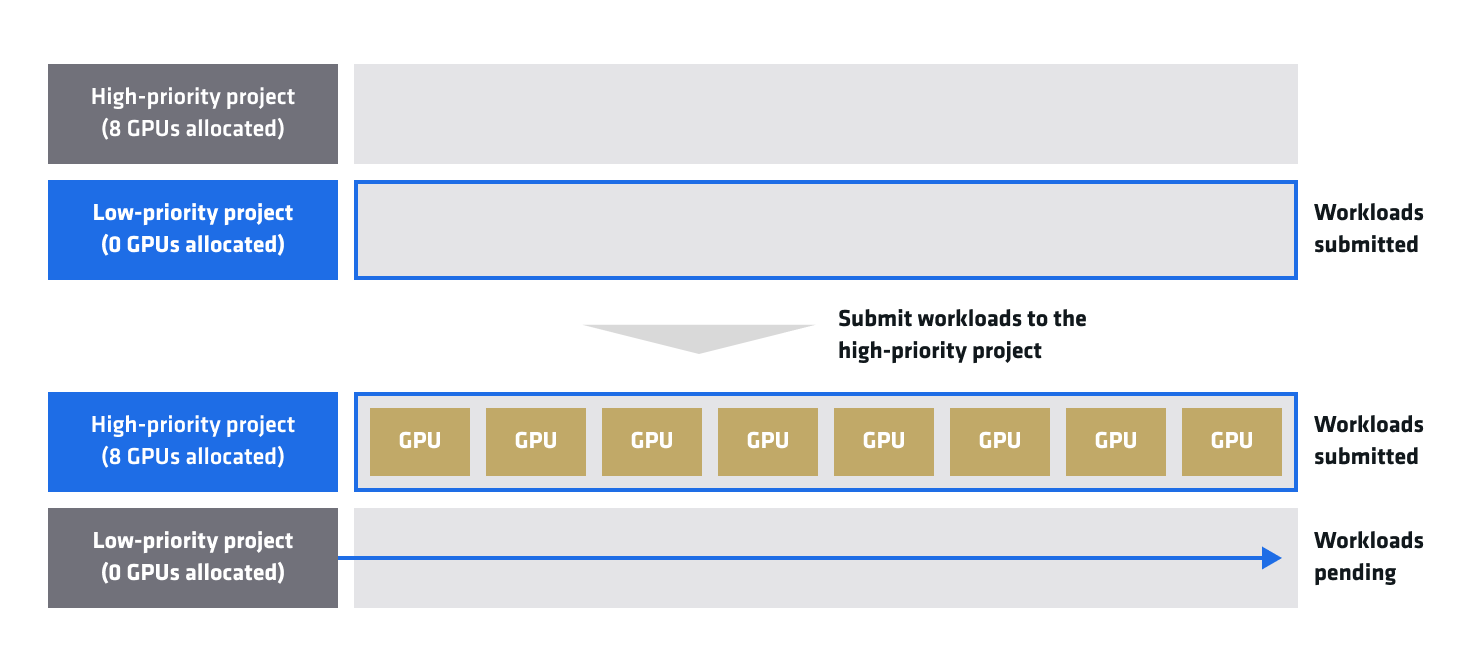
Figure 3: High-priority project running on 8 GPUs; low-priority project pending.
To walk through resource sharing and pre-emption with a hands-on example, see the Resource sharing and pre-emption tutorial.
Guaranteed quota tab#
The Quota tab lets you set the project’s guaranteed minimum for each resource using the sliders or the input fields. To understand how these values affect resource sharing and pre-emption, see Resource sharing and pre-emption above. Note that idle or unused resources can still be consumed by other projects until the project with quota needs them, at which point the resources will be reclaimed.
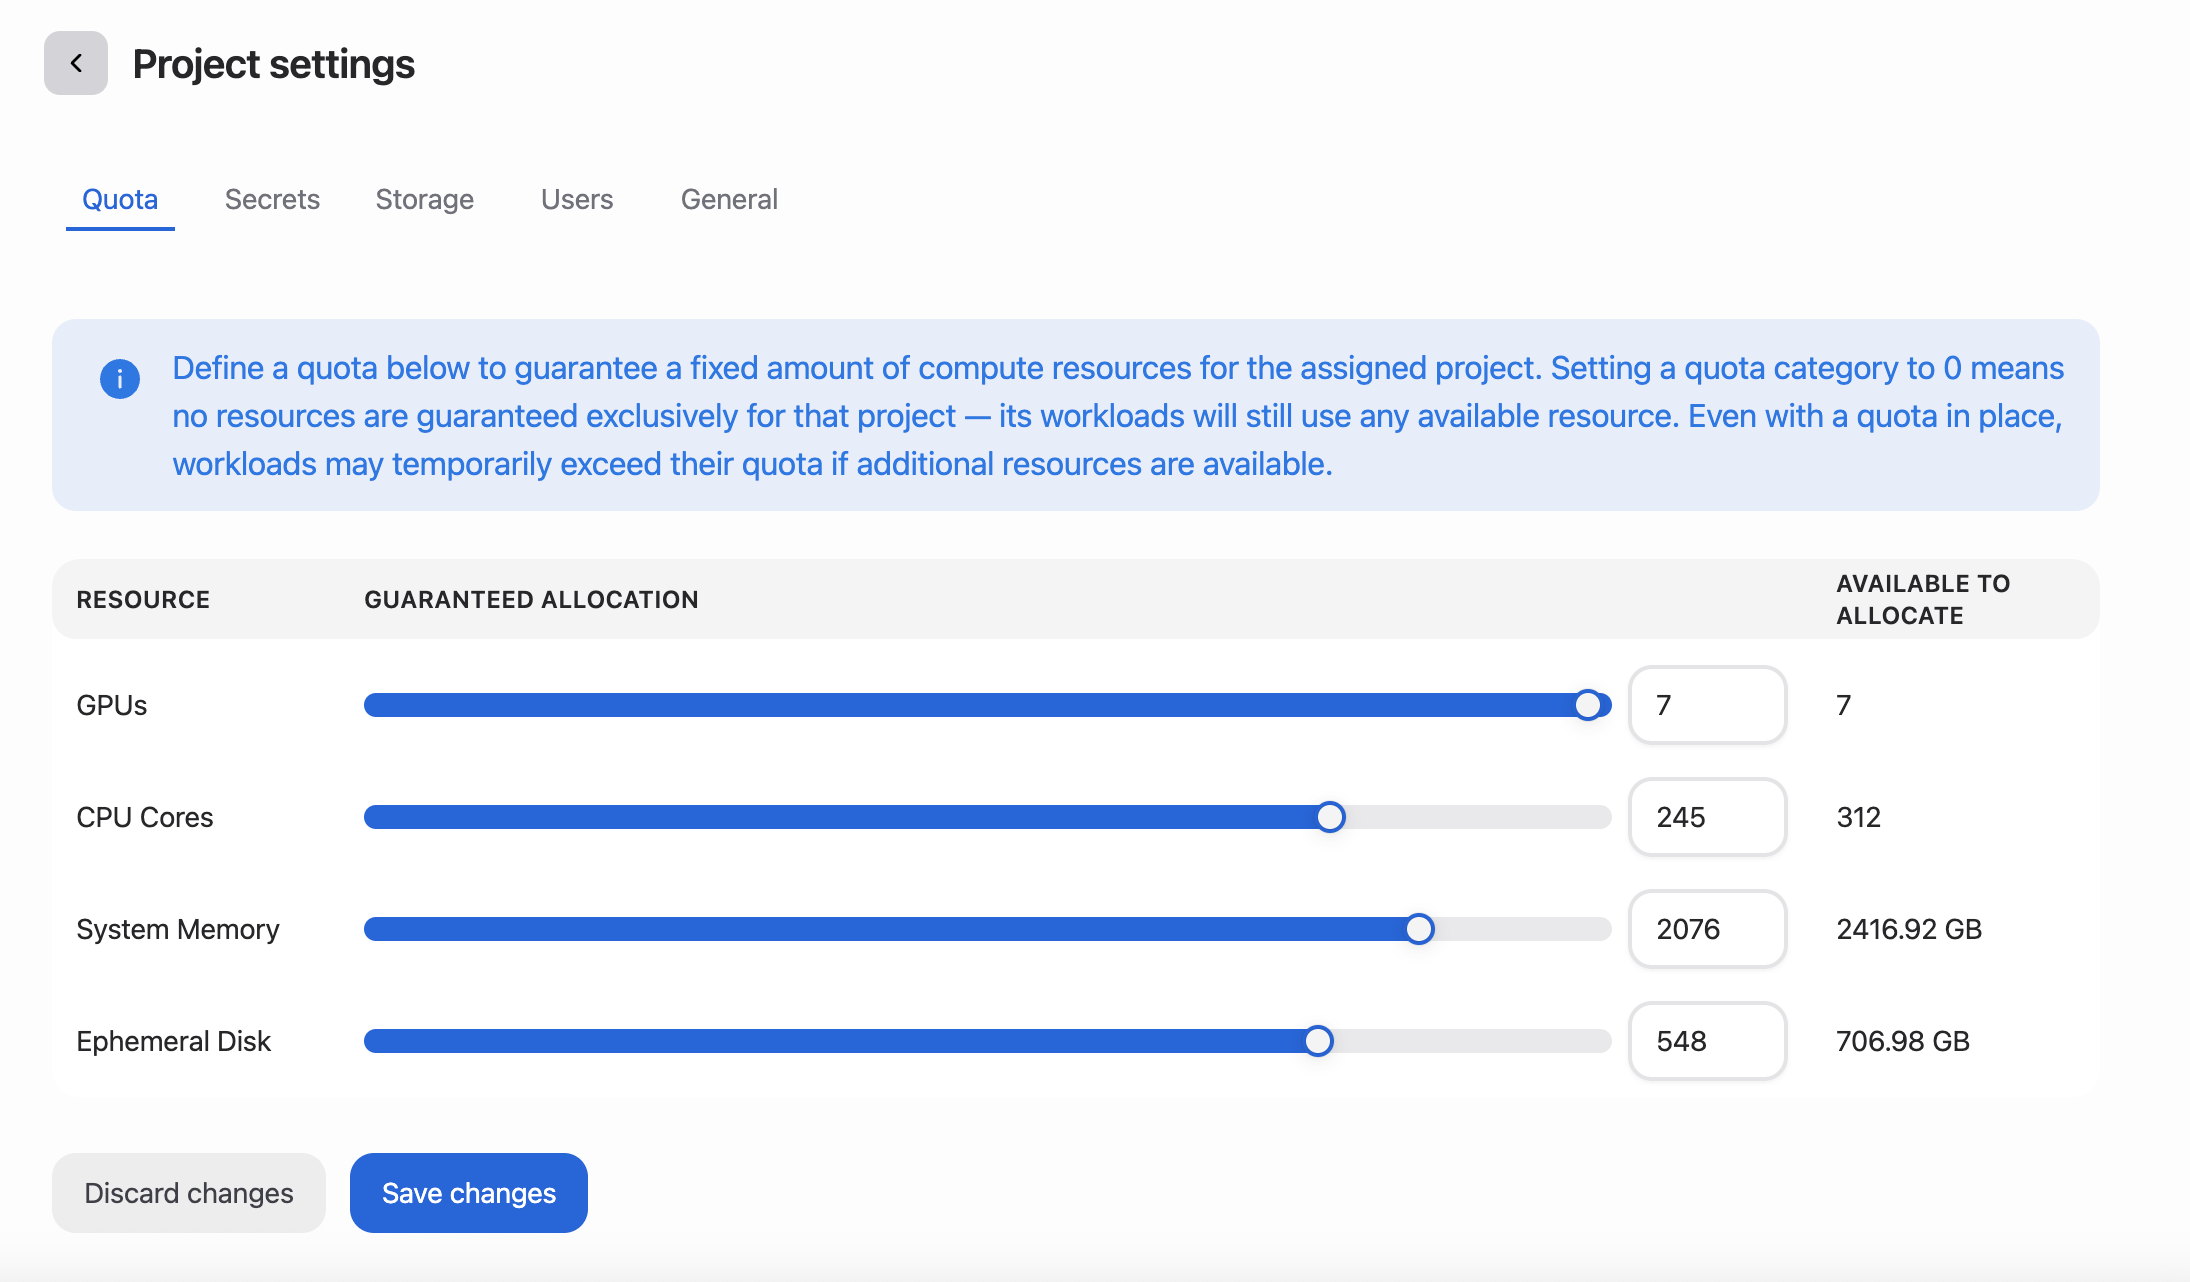
GPU allocation — Guaranteed number of GPUs for this project’s workloads.
CPU allocation — Guaranteed number of CPUs for this project’s workloads.
System memory — Guaranteed memory for this project’s workloads.
Ephemeral disk allocation — Guaranteed ephemeral disk for this project’s workloads.
Project Storages#
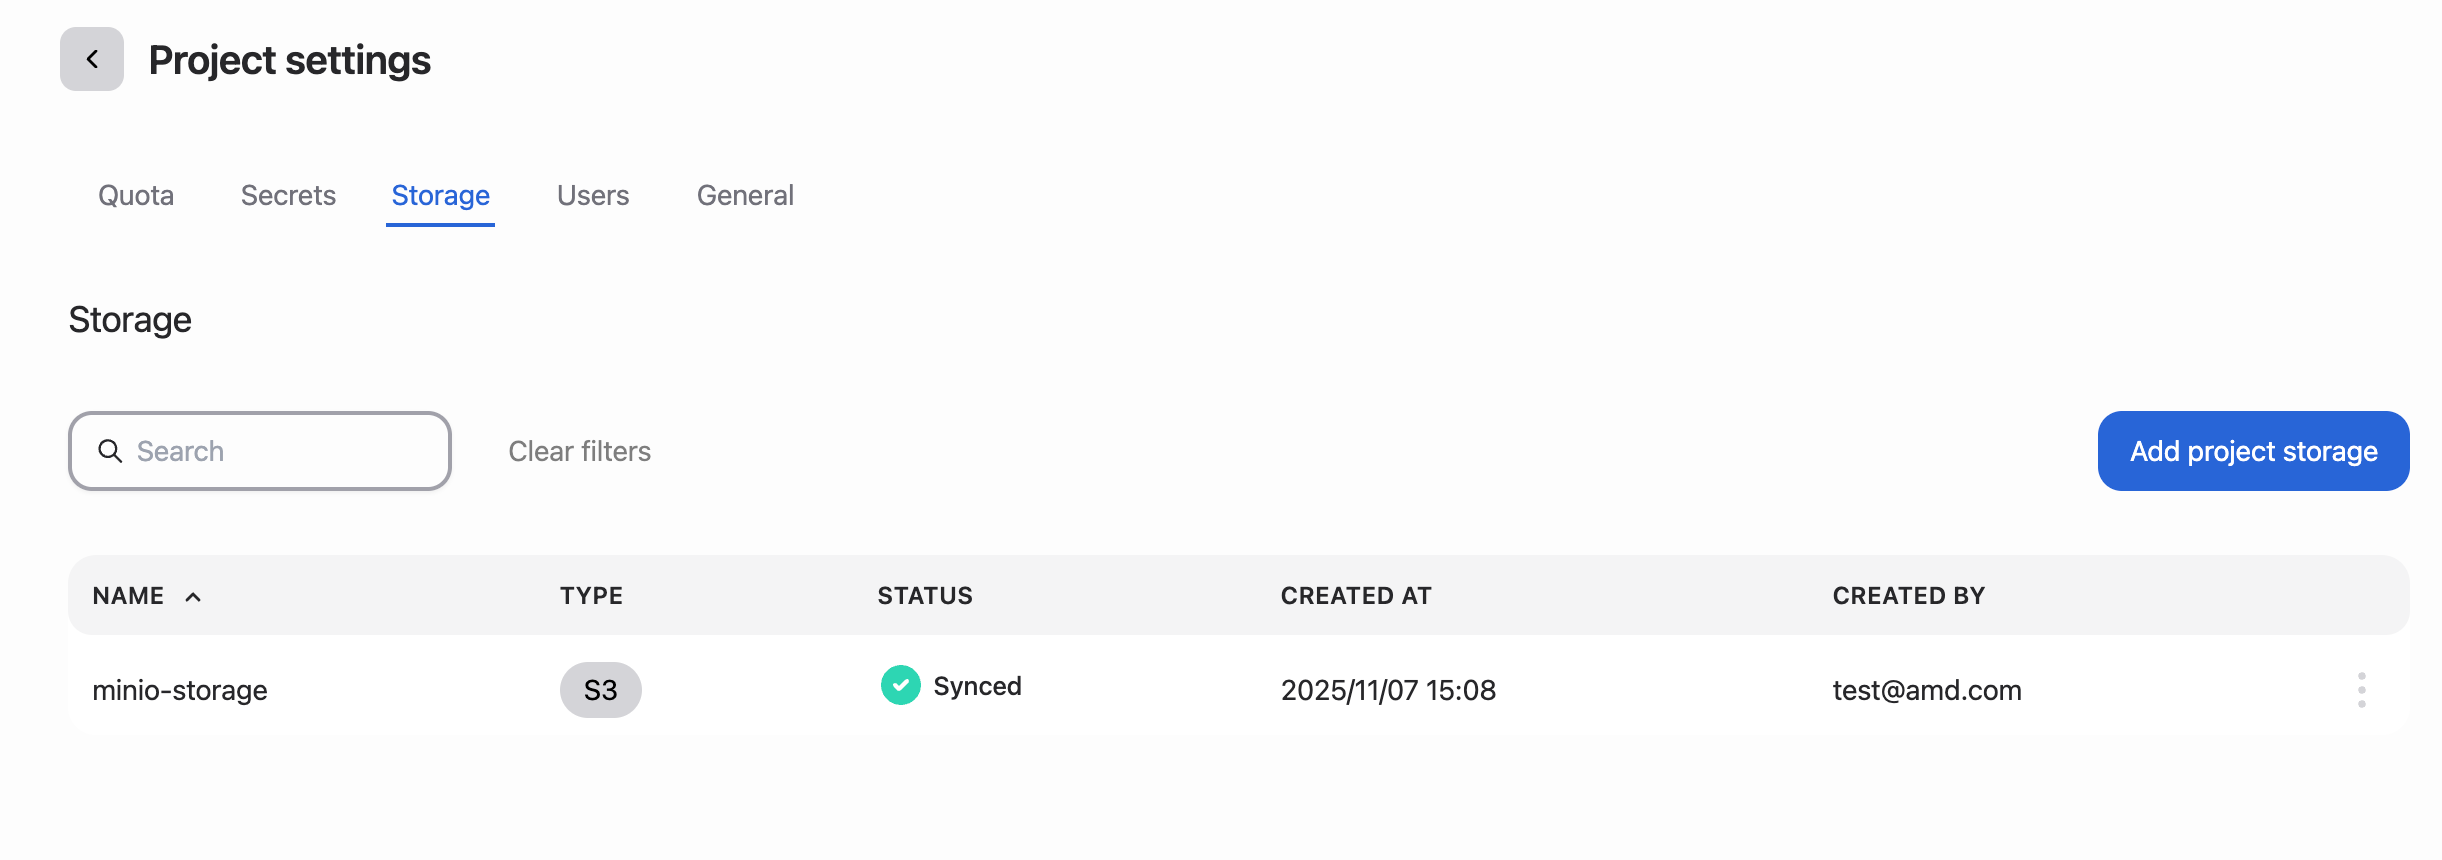
The Storage tab of the Project settings page allows you to manage storage resources assigned to the project. Storage resources, such as S3 buckets or file shares, are managed at the organizational level and can be assigned to projects as needed. When a Storage is assigned to a project, a Kubernetes Config map and the corresponding secret are created within the project’s namespace. This allows workloads within the project to access the assigned storage resources securely.
Project Secrets#
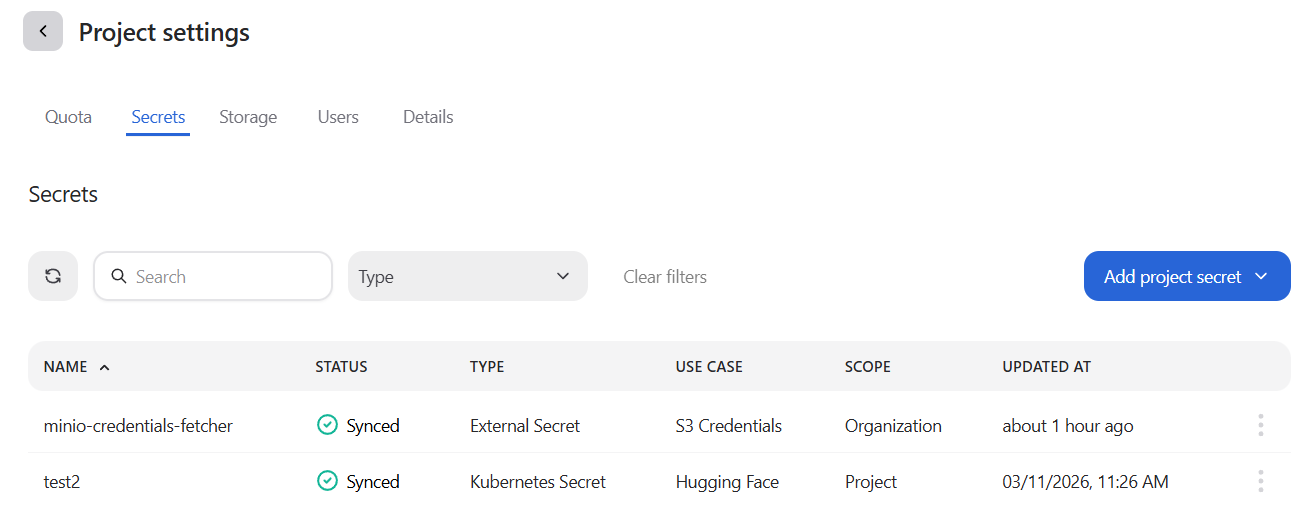
The Secrets tab of the Project Settings page allows you to manage sensitive information, such as API keys, tokens, passwords, or certificates, that are required by workloads within the project. When a Secret is created or assigned to a project, the corresponding Secret object - either a Kubernetes Secret or an External Secret - is created within the project’s namespace. This allows workloads within the project to access the secret data securely.
Users#
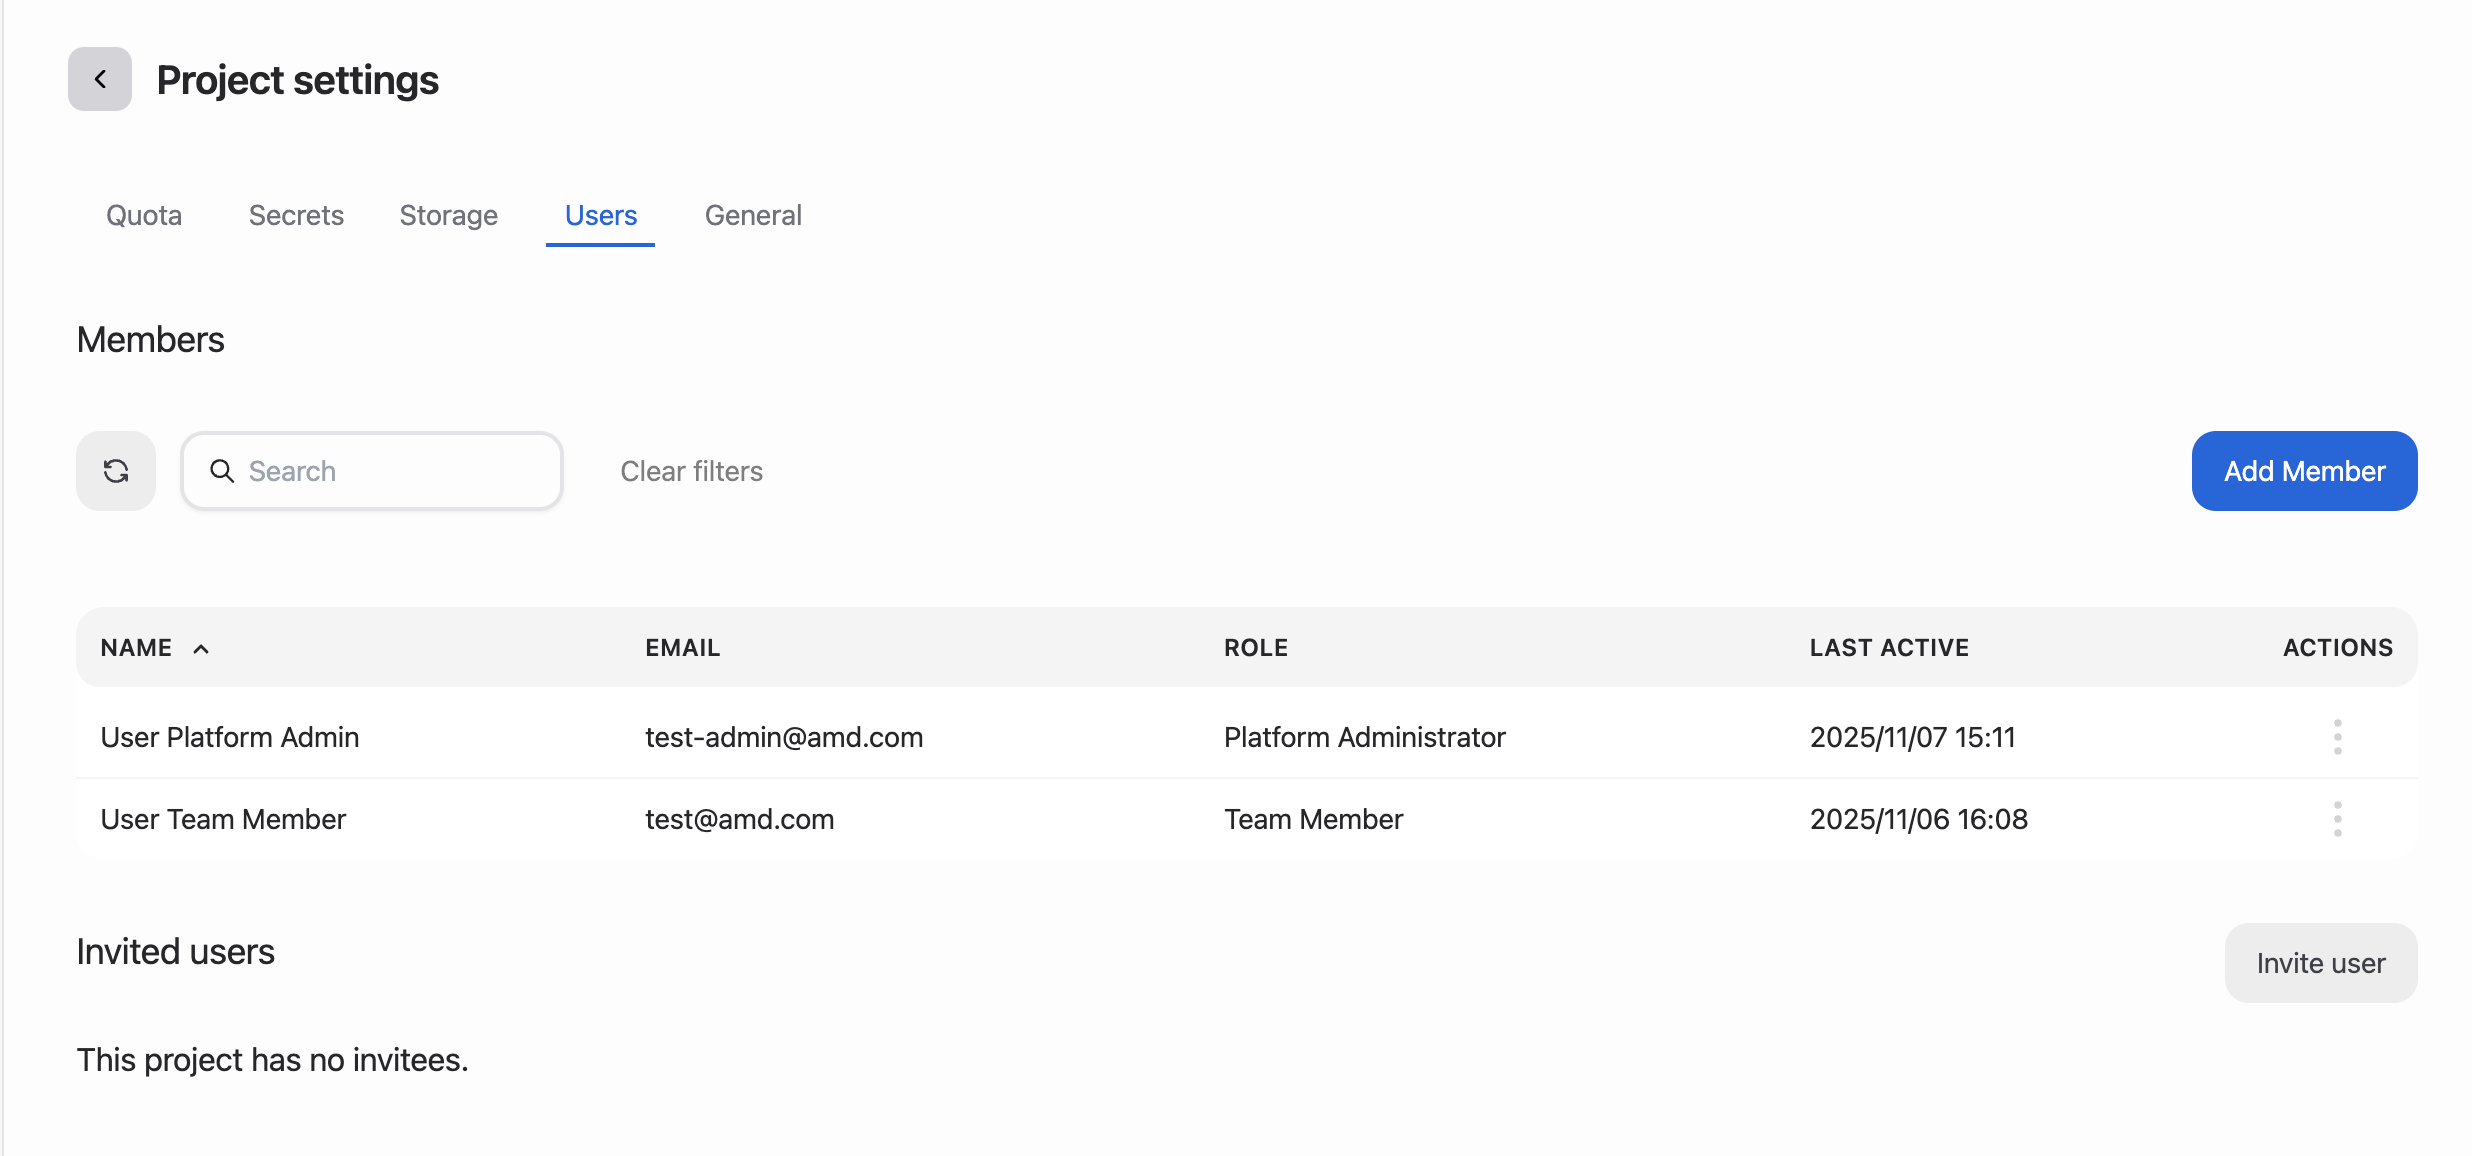
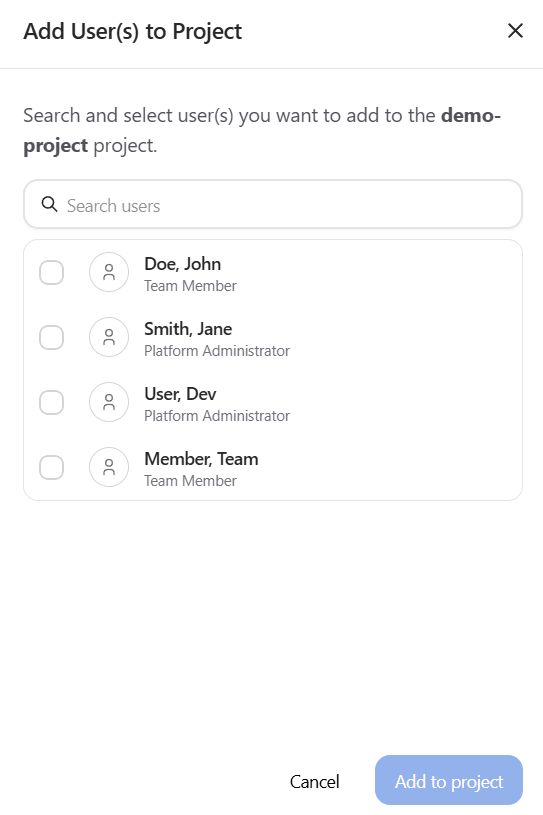
The Users tab of the Project settings page allows you to manage user access to the project. You can add or remove users from the project, which in turn grants or revokes access to the namespace associated with the project. If your organization has SMTP configured, you can also invite users to join the project via email, using the Invite User button.
Workload Preemption#
On the Details tab of the project settings page, the Workload preemption section allows platform administrators to configure how the scheduler reclaims GPU resources from idle workloads in the project. When enabled, the platform applies scheduling configuration to the project’s Kubernetes namespace so that idle GPU capacity can be reclaimed for other workloads.
Platform administrators can set the preemption policy, GPU activity threshold, and idle timer. Team members can view the current configuration but cannot modify it.
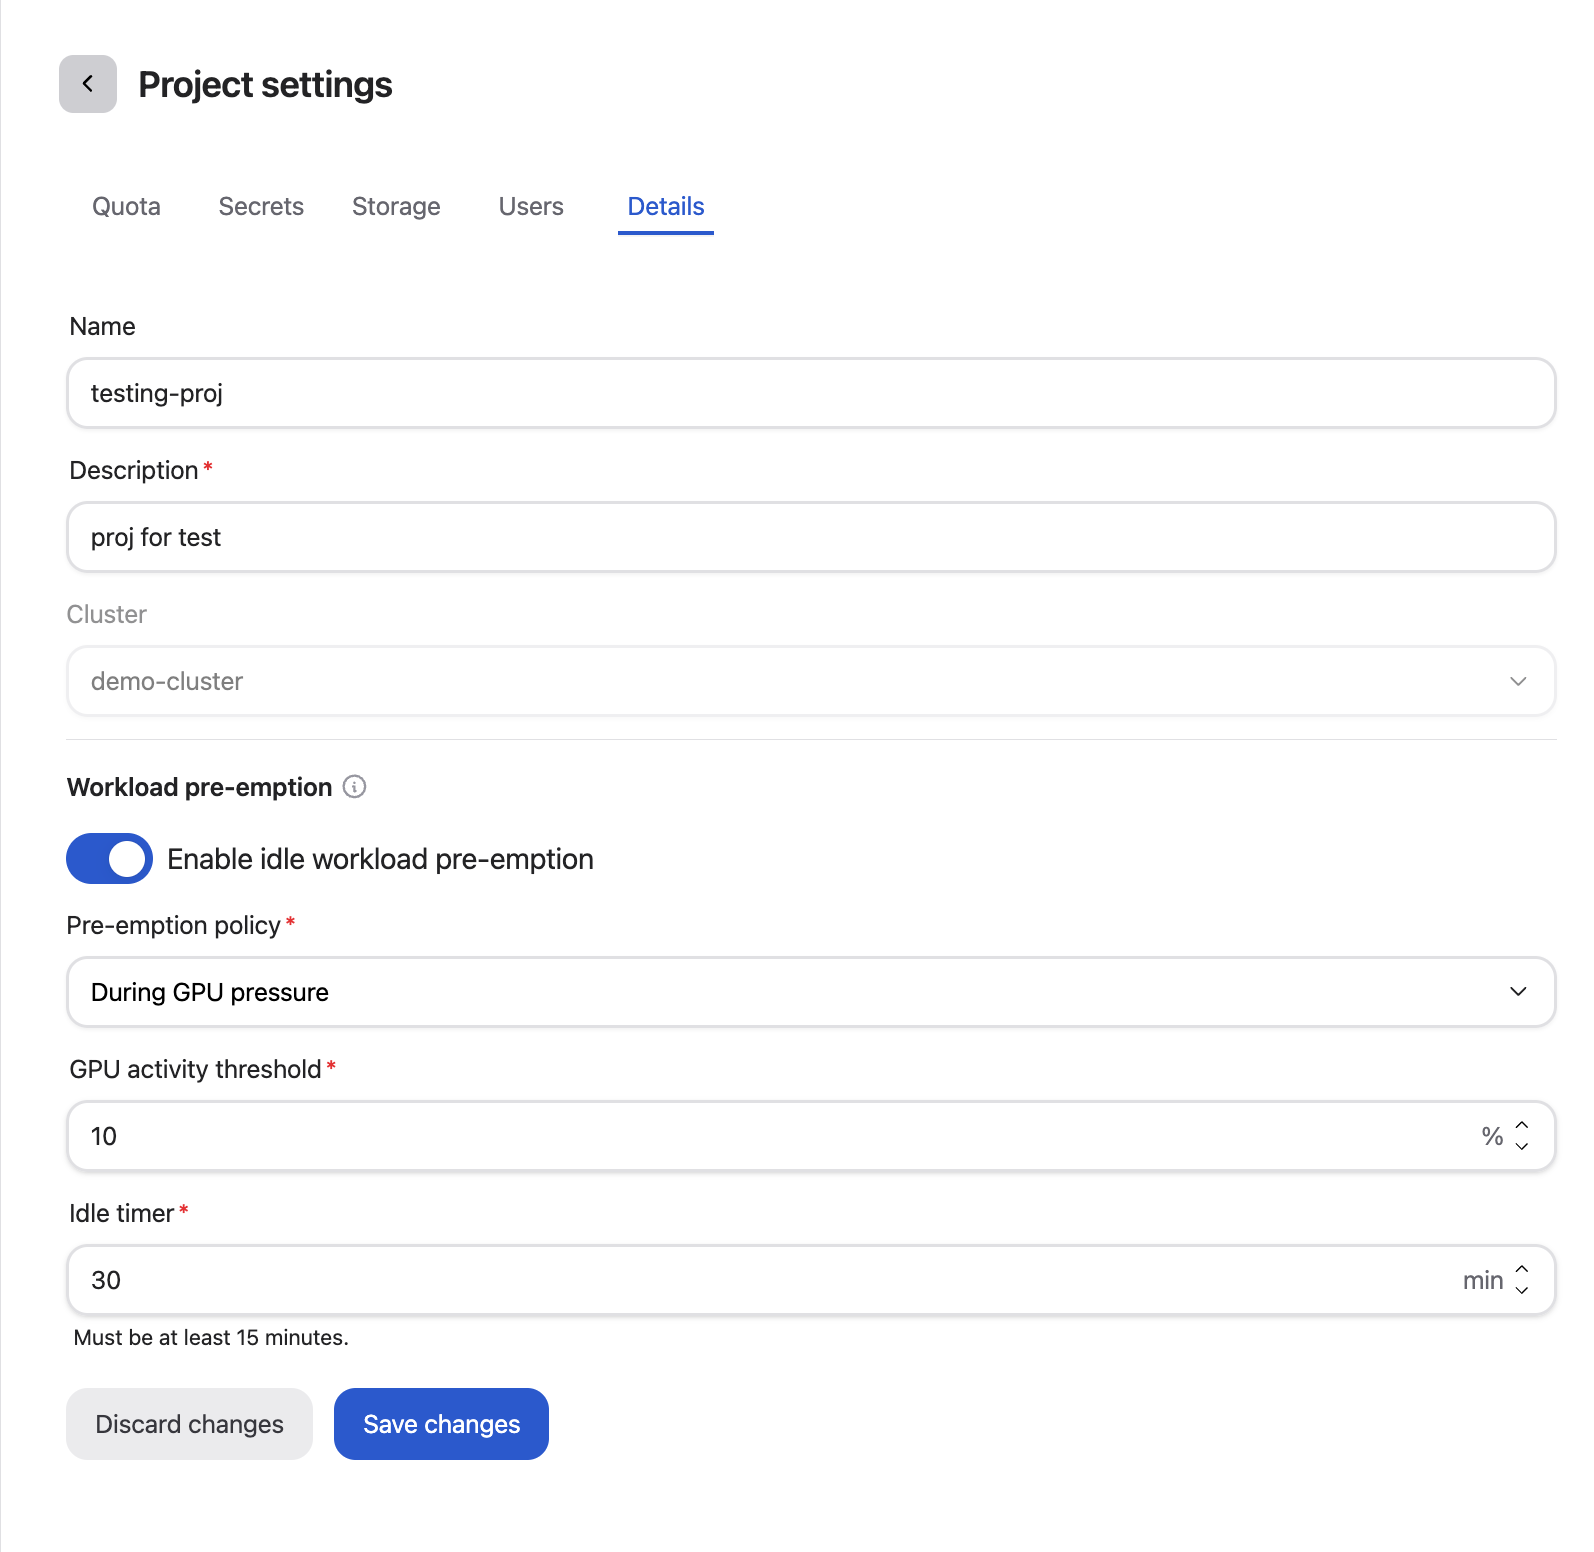
For a full description of each option and role-based access, see GPU Preemption.
Deleting a Project#
If you need to delete a project, on the Projects page select that project, open Actions (⋯), choose Edit settings, go to the Details tab, scroll to the Danger zone, and click Delete project.
Warning
Deleting a project is a permanent action and cannot be undone. When you delete a project, all workloads, data, and configurations associated with that project will be permanently removed. Please ensure that you have backed up any important data before proceeding with the deletion.