Deploy a Custom Model#
After you onboard a custom model from Hugging Face, it appears in the Custom Models tab of the Model Catalog. Once the model is ready, you can deploy it as an inference service and connect to it like any other model in the project. This page covers deploying a ready custom model, what to expect while it starts, how to confirm the deployment is healthy, and the main things you can do with it afterward.
Before You Begin#
The custom model must be ready to deploy. A model is ready when its onboarding has finished — its card no longer shows an Importing or Onboarding status, and its Deploy button is enabled. See Onboard a Custom Model from Hugging Face for the onboarding flow and how to track its status.
You need access to a project with capacity to run the model. Deployments consume project resources (including accelerators), so make sure your project has enough quota available.
Deploy the Model#
Go to the Models page and open the Custom Models tab.
Find the model you want to deploy and select Deploy on its card.
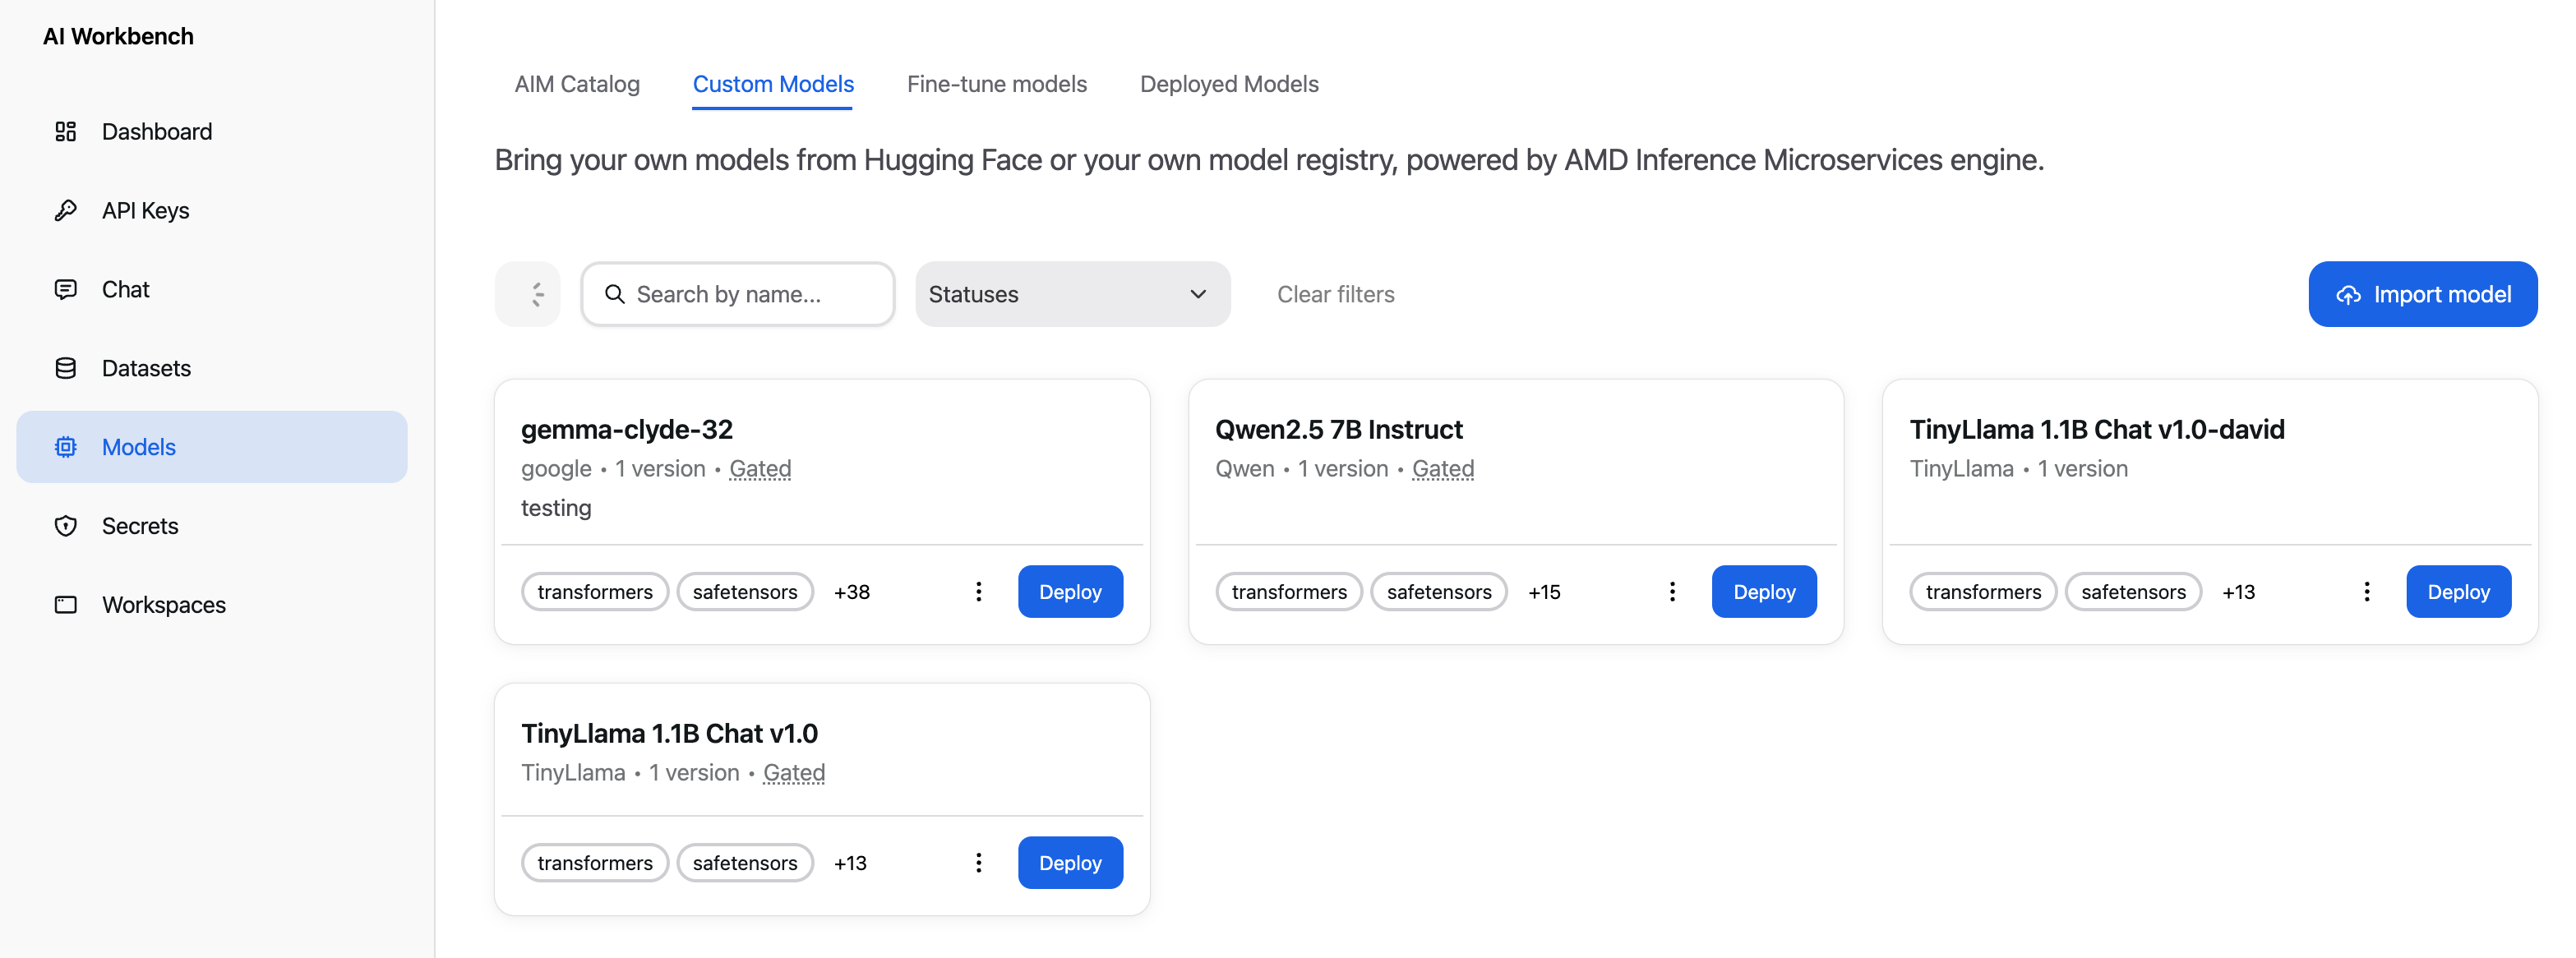
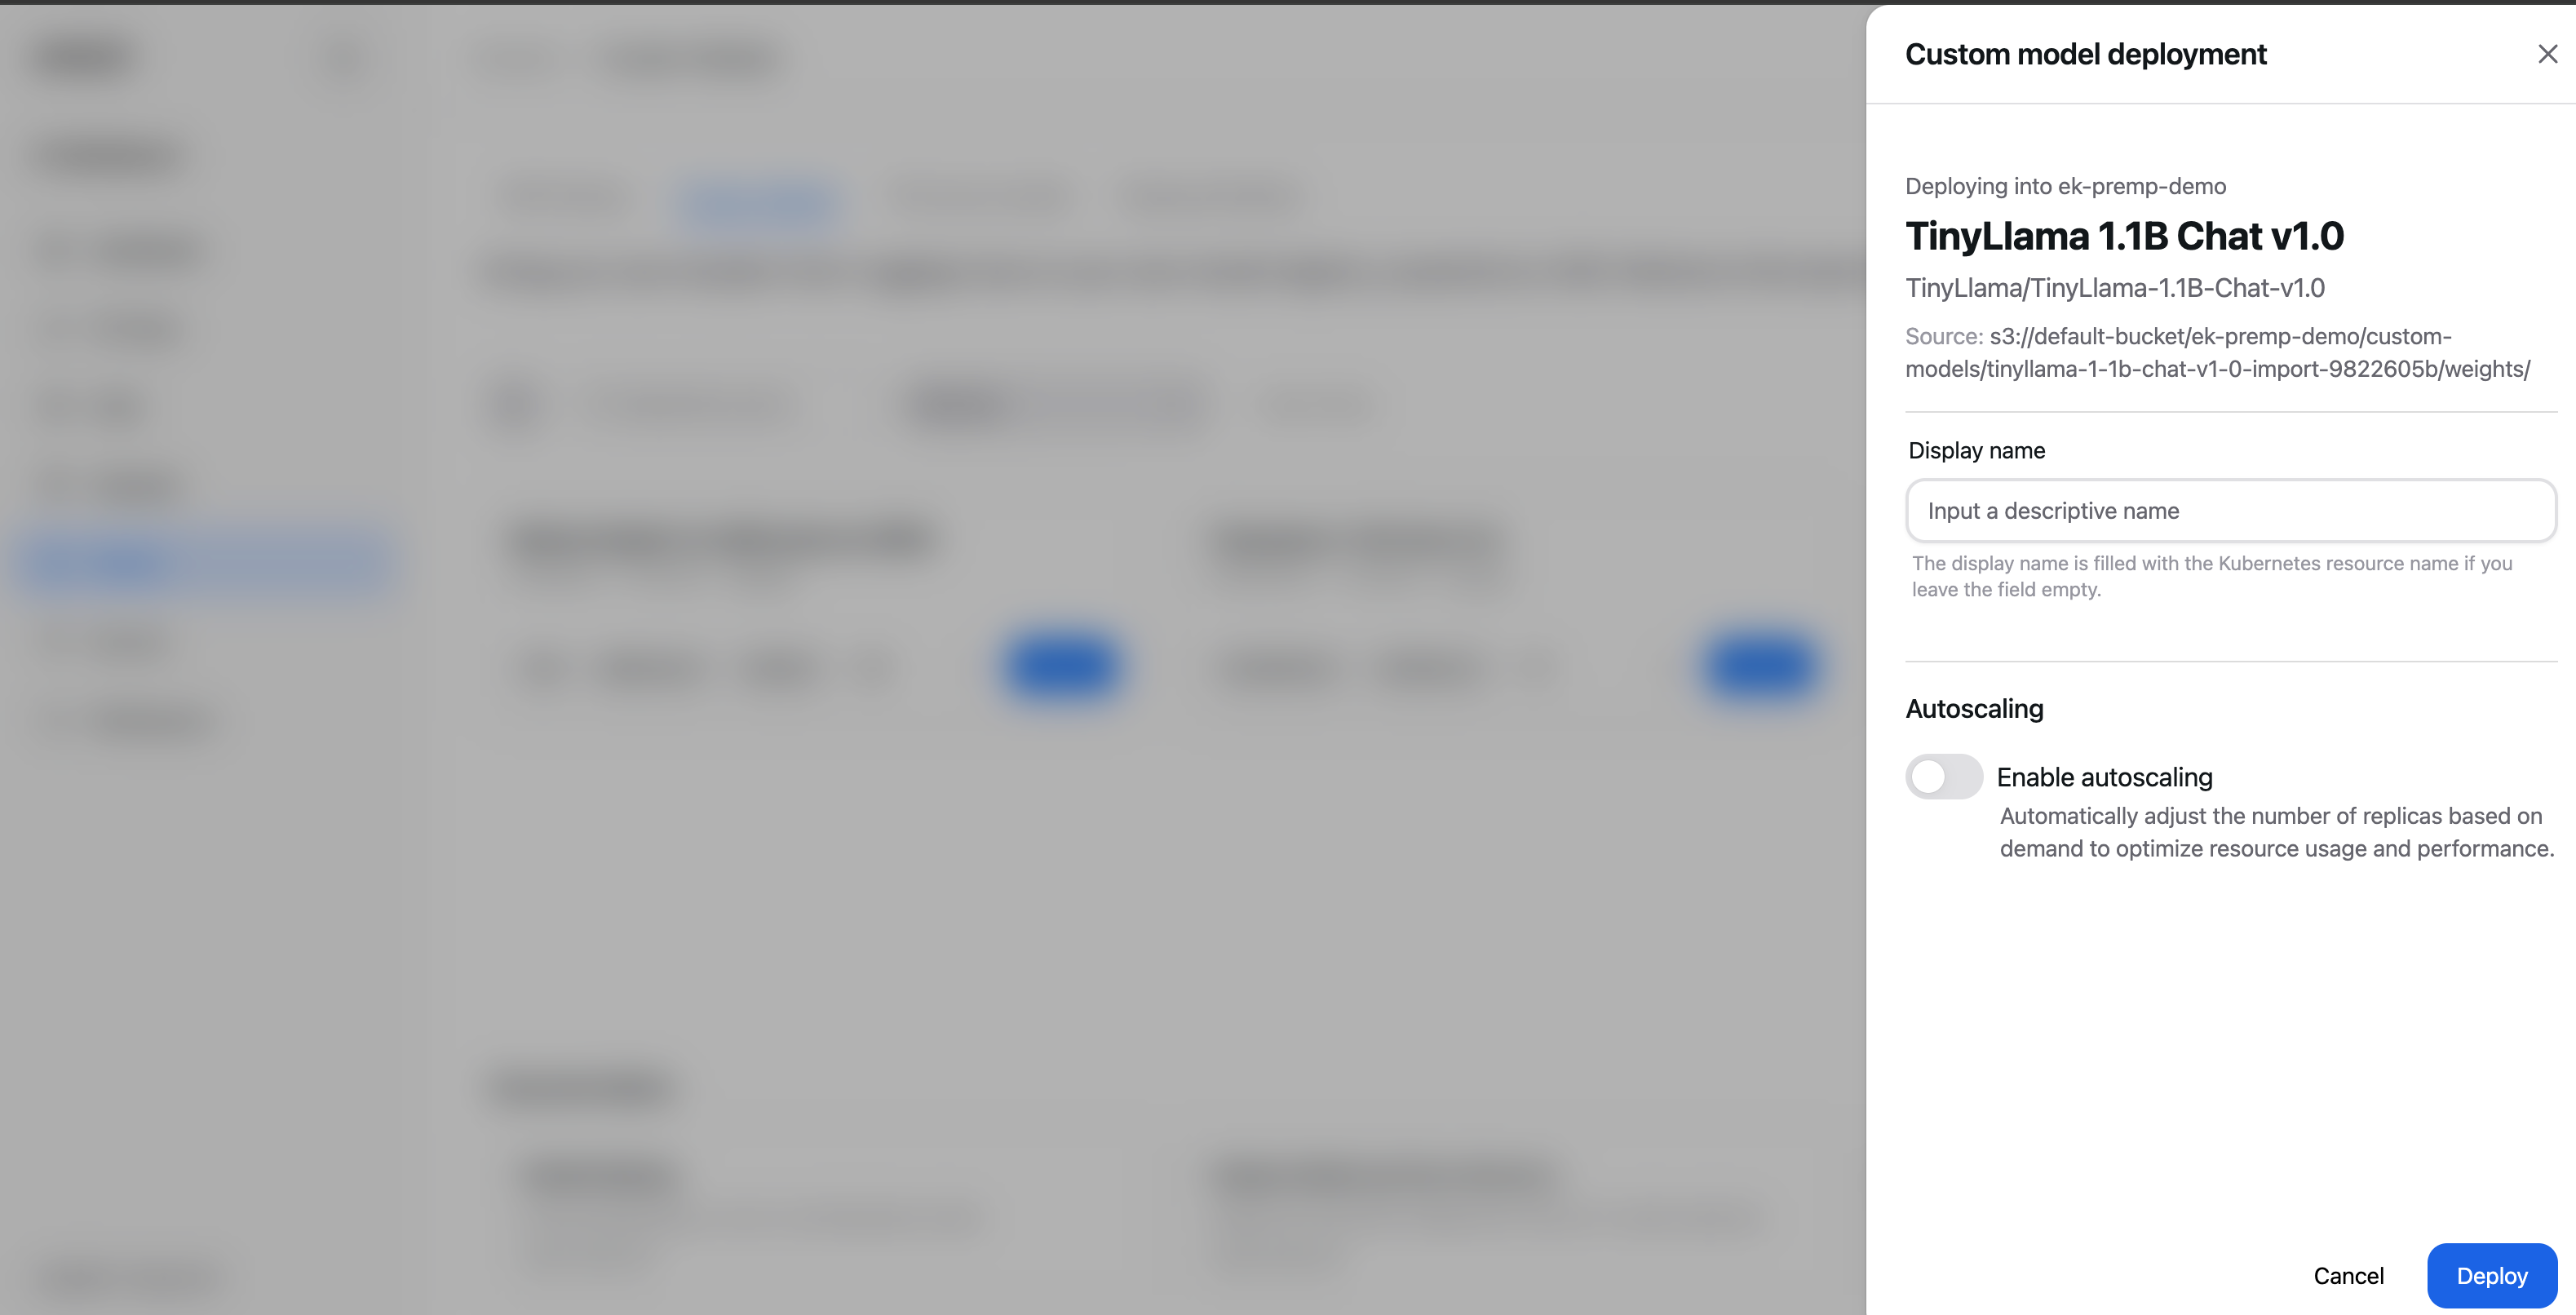
In the Custom model deployment drawer, review the model details and set the deployment options:
Display name — an optional, descriptive name for this deployment. If you leave it empty, the deployment uses a generated name.
Autoscaling — optionally enable autoscaling so the deployment adjusts its replica count with demand. Autoscaling can only be enabled at deploy time. For details on the autoscaling options, see Advanced Deployment Options.
Select Deploy.
The Workbench confirms that the deployment has started and begins bringing the model up in the background.
Note
The deployment drawer does not include runtime profile tuning. A custom model runs with the container image and runtime profile chosen during onboarding. Advanced runtime options (such as engine arguments and environment variables) are changed on the model itself through its settings, not at deploy time.
What to Expect After Deploying#
Deploying is not instant. The platform schedules the workload, pulls the container image, and loads the model weights from your project’s storage before the model can serve requests. The first deployment of a large model can take several minutes.
You can follow progress from the Models page on the Deployed Models tab, or in the Workloads section. A deployment moves through these states:
Pending — the deployment has been accepted and is waiting to be scheduled.
Starting — the container is starting and the model is loading.
Running — the model is serving and ready to use.
Failed — the deployment did not come up. See Troubleshooting below.
You don’t need to keep the drawer open while the deployment starts.
Verify a Healthy Deployment#
Go to the Models page and open the Deployed Models tab.
Find your deployment and check that its status is Running.
For more detail, open the deployment’s action menu and select Open details to open its workload detail page, where you can review the deployment’s components and inference metrics.
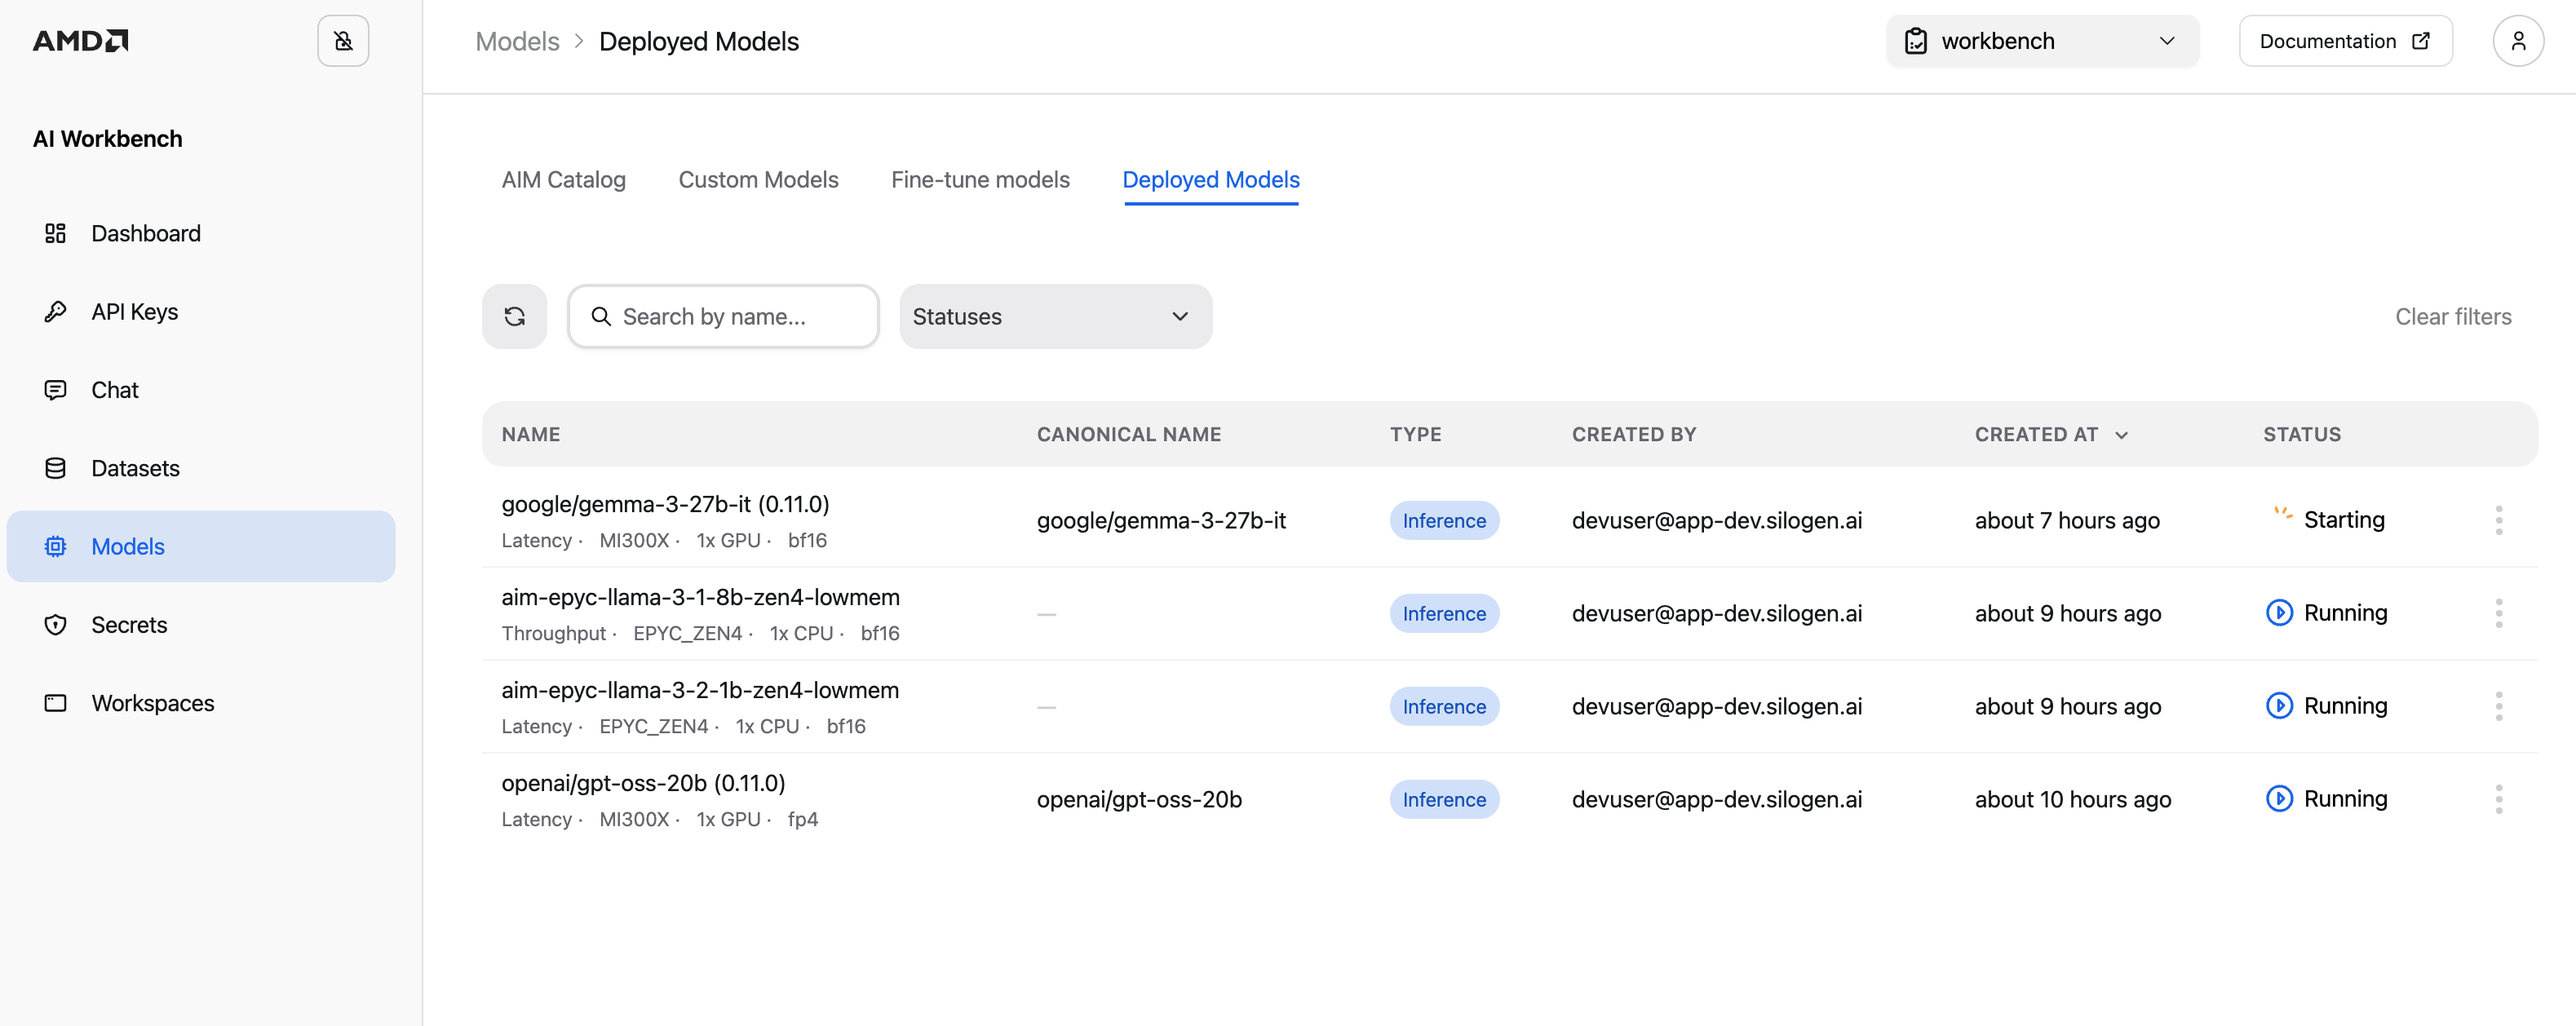
A deployment in the Running state is healthy and ready to receive requests. If it stays in Pending or Starting for a long time, or shows Failed, see Troubleshooting.
Work with a Deployed Model#
From the Deployed Models tab, open a running deployment’s action menu to:
Connect to model — open the connection details (such as the model’s endpoints) you need to call the model from your own applications.
Chat with model — open the Chat page with the deployment selected, so you can try it interactively. Chat is available for deployments that support chat-style responses.
Open details — open the workload detail page to review the deployment’s health and inference metrics.
Undeploy — remove the deployment when you no longer need it. This stops the inference service and frees its resources; your onboarded model remains in the Custom Models tab and can be deployed again later.
Troubleshooting#
Deployment Stays in Pending or Starting#
A deployment can sit in Pending while it waits for resources, or in Starting while a large model loads. If it does not reach Running after a reasonable wait:
Confirm your project has enough available capacity (including accelerators) for the model. A deployment cannot start if the required resources are not available.
Open the deployment’s workload detail page to review its components for a more specific reason.
Deployment Failed#
If a deployment shows a Failed status, open its workload detail page to see why it did not start. Common causes include insufficient project resources or an incompatible runtime configuration. After addressing the cause, undeploy the failed deployment and deploy the model again.
Chat Is Not Available#
The Chat with model action appears only for running deployments that support chat-style responses. If you don’t see it, confirm the deployment is Running; if it is running and chat still isn’t offered, the model does not expose a chat-compatible interface. You can still Connect to the deployment and call its endpoints directly.