Projects and quotas#
This guide walks you through setting up a project, so that you can deploy workloads, set GPU and compute resource quotas, and retrieve the kubeconfig.yaml file for connecting to your cluster.
For terms such as quota, project, and workload, see Glossary: Projects and guides.
Note
Refer to the documentation on Accessing the cluster for more information.
Prerequisites#
Access to AMD Resource Manager: You must have access to an installed instance of AMD Resource Manager. See the AMD Resource Manager installation documentation for supported environments and installation details.
Technical proficiency: A working knowledge of the command line and tools such as
kubectland k9s (or similar tools for monitoring the cluster) is recommended for the steps in this guide.
Creating a project with a quota#
We’ll begin by setting up and configuring a project within AMD Resource Manager. Projects enable you to organize your work on the platform, and each one is kept separate—resources, workloads, and secrets from one project can’t be accessed by another. This separation maintains security and keeps each project clearly defined. You can also assign quotas to each project, ensuring users have the necessary resources to run their workloads successfully in shared clusters. A quota defines the ensured amount of resources, such as GPUs, CPUs, and memory, that can be used by workloads within the project. Note that a project can consume additional resources if there are unused resources available.
In this section, we will walk through the process of setting up a new project, configuring basic storage, and adding users.
Setting up the project#
First, create a new project with the minimum configuration required to begin deploying workloads.
To create your project:
Navigate to the Projects page
Click the Create project button
Enter the project name (for example,
demo-project), a description, and select your clusterClick Create project
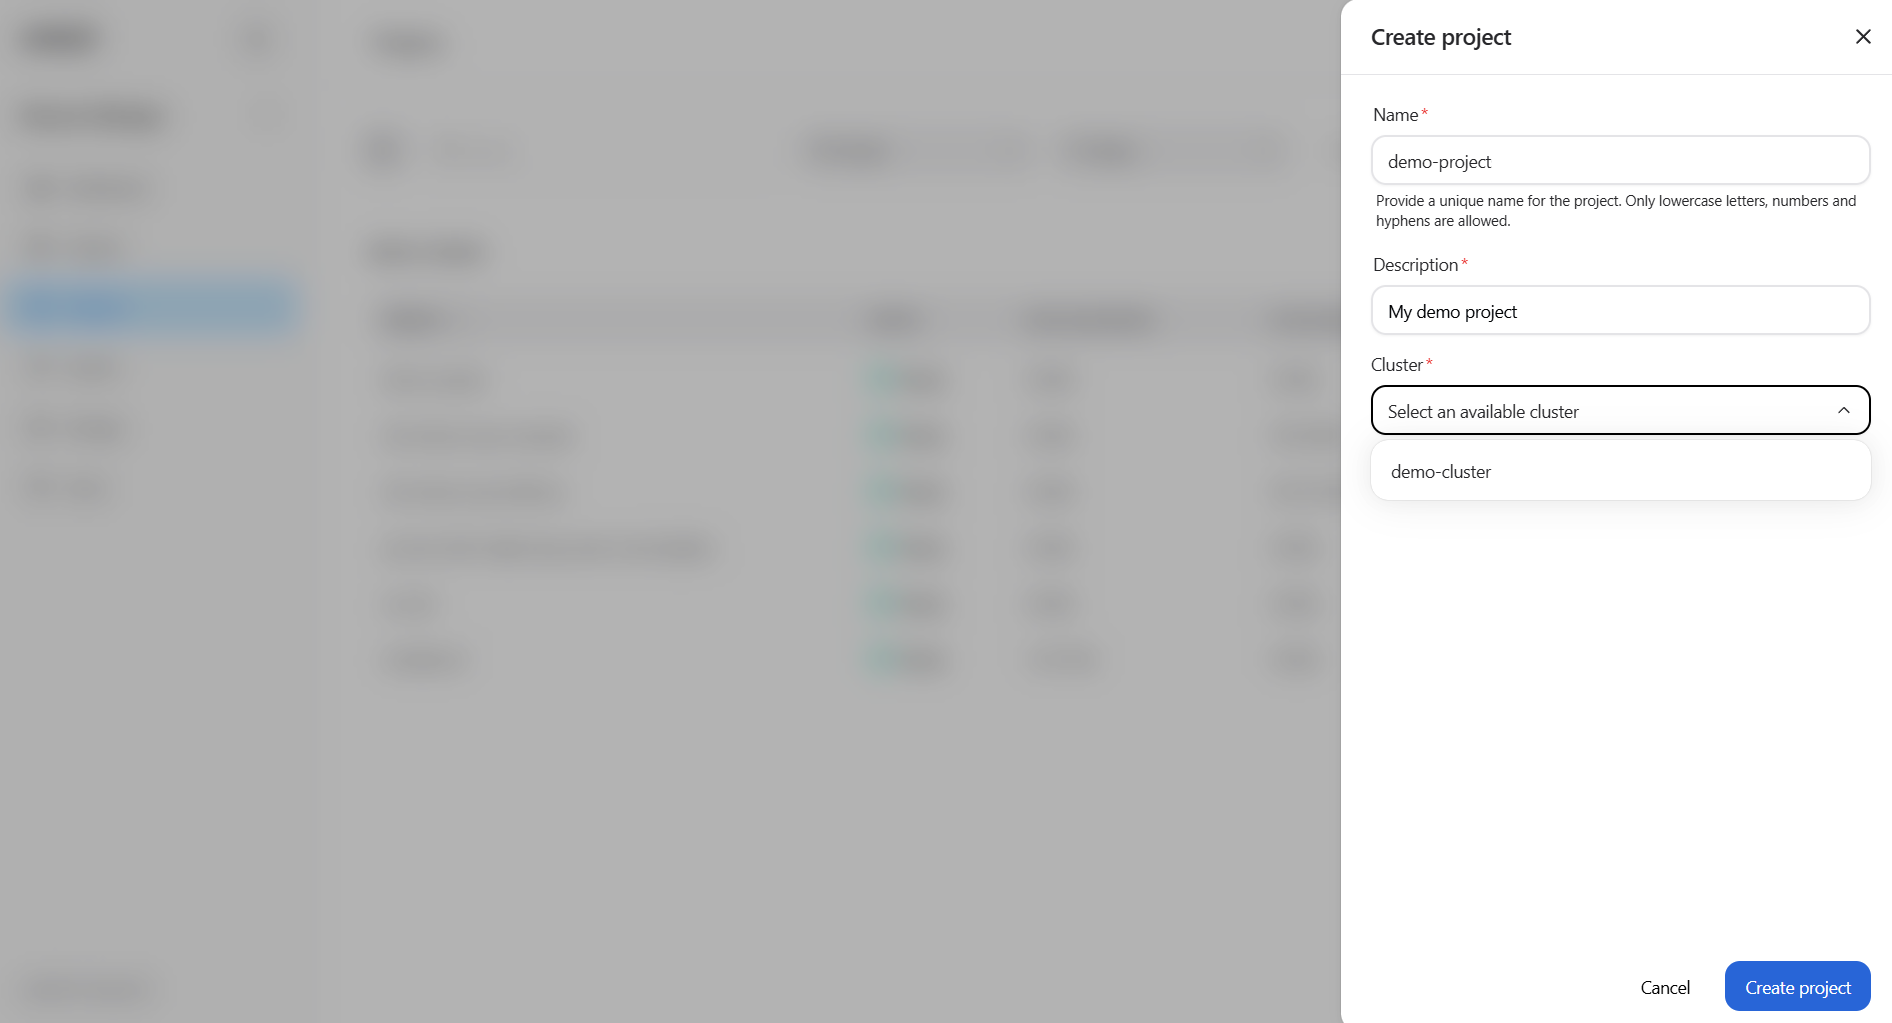
Figure 1: The “Create project” dialog box.
You should receive a confirmation that the project was created successfully and be automatically redirected to the Project settings: Quota page.
On this page, you can define the quota for the project. As we will adjust these settings in a later section, you may leave the default values unchanged for now.
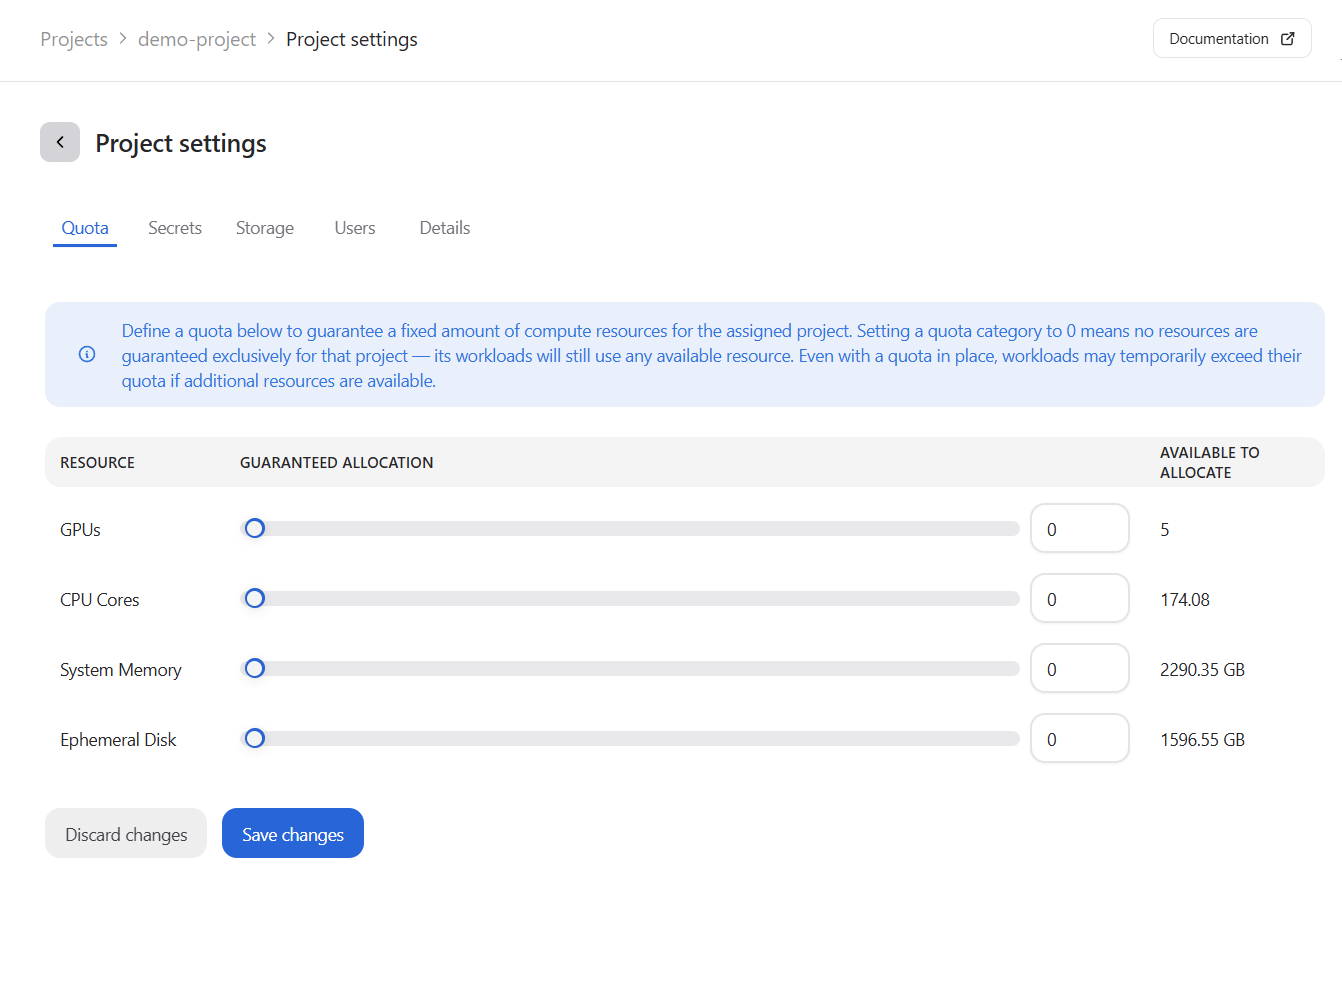
Figure 2: The Project settings page following successful project creation.
To ensure storage is configured for your work on the platform, we will now configure access to the default storage in the cluster:
Navigate to the Secrets tab in the project settings (located next to “Quota”, see Figure 3).
Click the Add project secret button and then select Assign existing secret.
Select the
minio-credentials-fetchersecret from the Secret drop-down menu (Figure 3).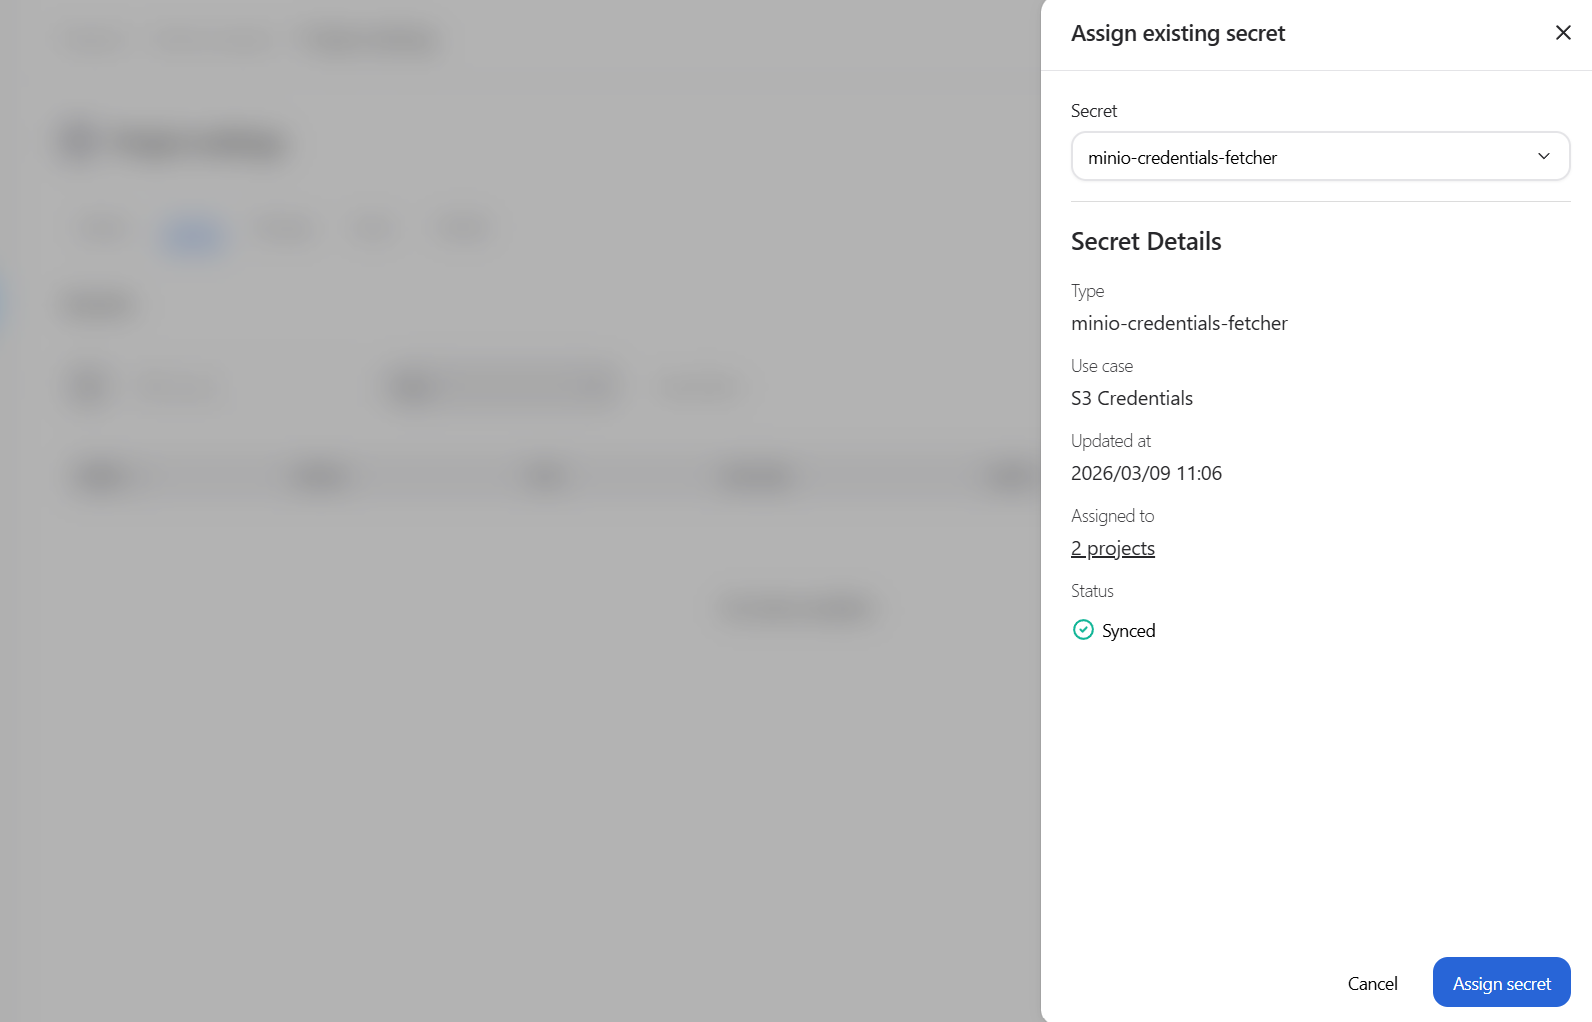
- alt:
The Assign existing secret project dialog box
   _Figure 3: The "Assign existing secret" project dialog box._

4. Click **Assign secret**. You should now see the secret added to the project (Figure 4).

```{image} ../../core-img/tutorials/project_settings_secrets.png
:alt: The Project settings Secrets page following the addition of the secret
Figure 4: The Project settings “Secrets” page following the addition of the secret.
Lastly, add existing users to the project:
In the project settings, click the Users tab (located next to “Storage”, see Figure 5).
Click the Add Member button.
Select yourself (and any other desired users) from the Users drop-down menu.
Click Add to project.
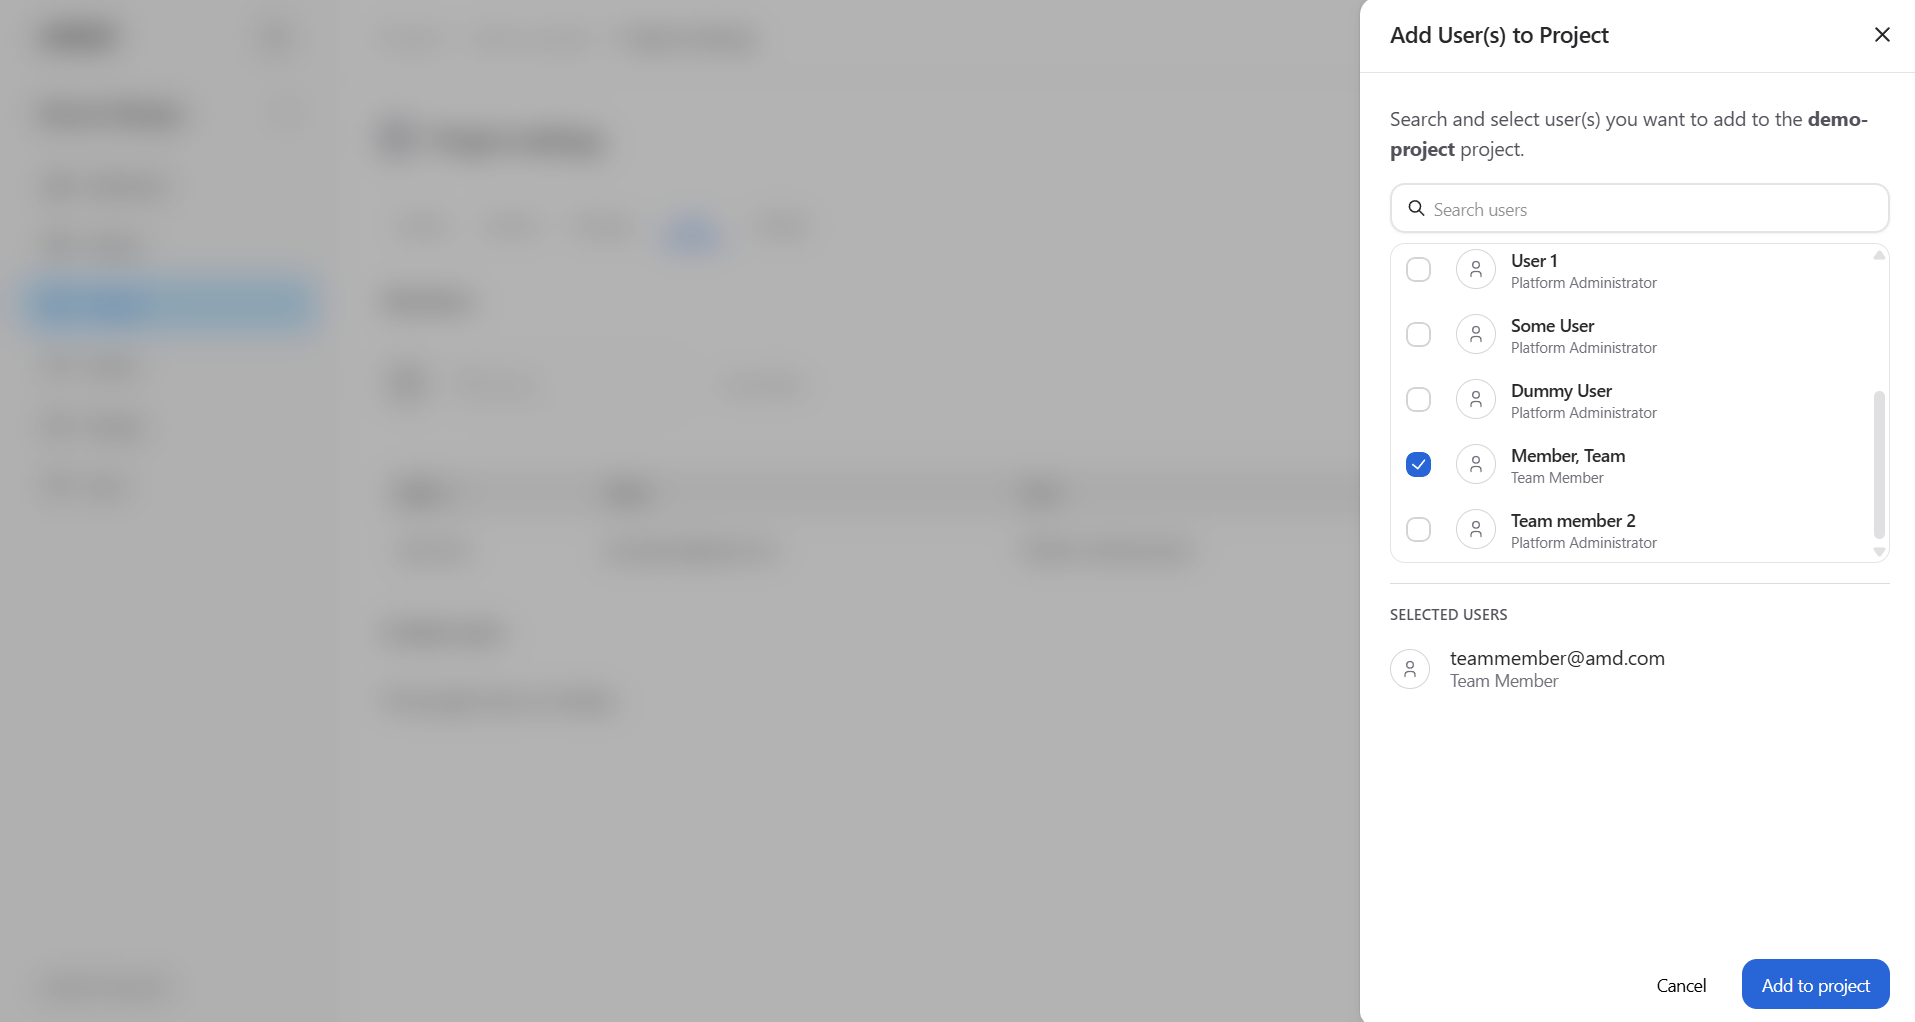
Figure 5: The “Add User(s) to Project” dialog box.
The project is now configured, allowing authorized users to deploy workloads within it.
Configuring the project’s quota#
Resource limits (quotas) can optionally be configured for each project to ensure that project members have access to the resources required for their workloads.
Note
Projects can consume more than their ensured quota if there are unused resources available. If a workload is submitted to a project that is already consuming its full quota, the system will attempt to borrow resources for it, if available. When a workload is borrowing resources, it will be suspended if another workload is submitted in a project that has unused quota and there are no other available resources—i.e., the project with unused quota has higher priority for the use of those resources.
To configure a project’s quota: if you are still within the project settings, you can simply return to the Quota tab. However, to illustrate how to view all available projects and their allocations, the following steps demonstrate an alternative path using the sidebar menu:
Navigate to the Projects page. Here you can see all the projects.
Click the project (for example,
demo-project).Click Project Settings (upper right corner). The Quota fields will be displayed, as shown in Figure 2.
Specify the quotas: GPUs = 2, CPU Cores = 97, System Memory = 800 GB, and Ephemeral Disk = 150 GB. (These quotas will be used in a later guide when demonstrating pre-emption.)
Click Save changes.
Obtaining the kubeconfig.yaml for your cluster#
In the next section, we will deploy workloads using kubectl. To access the cluster using tools such as kubectl you must obtain the kubeconfig file for the cluster. Follow these steps to retrieve the kubeconfig information from the Clusters page:
Navigate to the Clusters page.
Click your cluster.
Click the View config button (upper right corner).
Copy the kubeconfig file (Figure 6).
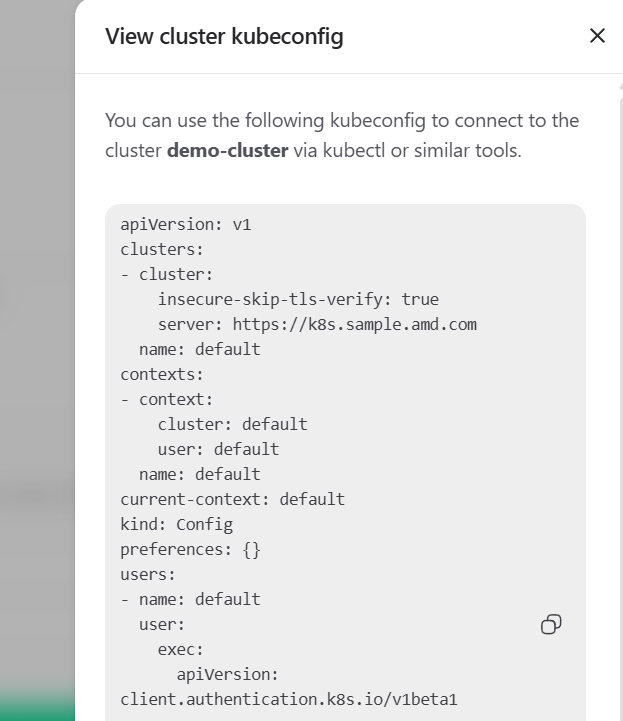
- alt:
The View config dialog box
   _Figure 6: The "View config" dialog box._

5. Store the file in a secure location on your local machine and set the `KUBECONFIG` environment variable to point to this file.
6. Install and set up the OIDC plugin [kubelogin](https://github.com/int128/kubelogin) using your kubeconfig file.

You should now be able to access your cluster using kubelogin. Let's move on to the next section.

```{note}
Refer to the documentation on [Accessing the cluster](../workloads/accessing-the-cluster.md) for more information.
Summary#
In this guide you created a project with a quota, configured access to storage (secrets) and users, set GPU and compute quotas in the Quota tab, and obtained the kubeconfig for your cluster. You are now ready to deploy workloads and monitor resource utilization in the next guide.